前言
作為一個資深(自認為)ios程序猿,會經常用到輪播圖,上一次使用uiscrollview實現無限輪播的效果,這一次在swift語言中,我使用uicollectionview再為大家講解一次無限輪播的實現原理。
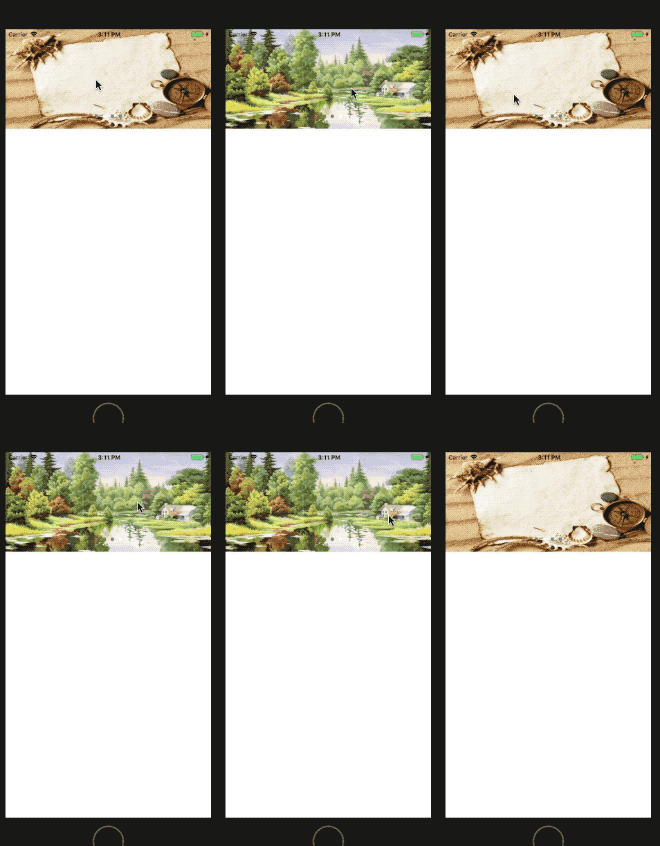
先上圖:

uicollectionview-無限輪播.gif
首先需要實現了就是uicollectionview的分頁,這個很簡單:
|
1
|
collectionview.ispagingenabled = true |
接下來就是原理,在uicollectionview的兩端需要先添加兩張圖片,首段需要添加最后一張圖片,而尾端需要添加第一張圖片,然后在中間的位置上一次添加各個圖片。這個其實是很容易實現的:
|
1
2
3
4
5
6
7
8
9
10
11
12
13
14
|
func collectionview(_ collectionview: uicollectionview, cellforitemat indexpath: indexpath) -> uicollectionviewcell {let cell = collectionview.dequeuereusablecell(withreuseidentifier: "imagecollectionviewcell", for: indexpath) as! imagecollectionviewcell/// 給圖片賦值(在首尾分別添加兩張圖片)if (indexpath.row == 0) { cell.imagename = imagenamelist.last} else if (indexpath.row == self.imagenamelist.count + 1) { cell.imagename = imagenamelist.first} else { cell.imagename = imagenamelist[indexpath.row - 1]}return cell} |
這樣在滑動的時候,通過偏移量就可以實現無限輪播的效果了。當滑動停止時判斷偏移量,當偏移量為0時(視圖上顯示的是最后一張圖片),這時候就直接調動調整偏移量的方法,把uicollectionview偏移到最后一張圖片的位置。滑動到尾端時是同理。
|
1
2
3
4
5
6
7
8
9
10
11
12
13
|
func scrollviewdidenddecelerating(_ scrollview: uiscrollview) {/// 當uiscrollview滑動到第一位停止時,將uiscrollview的偏移位置改變if (scrollview.contentoffset.x == 0) { scrollview.contentoffset = cgpoint(x: cgfloat(self.imagenamelist.count) * kscreenwidth,y: 0) self.pagecontrol.currentpage = self.imagenamelist.count /// 當uiscrollview滑動到最后一位停止時,將uiscrollview的偏移位置改變} else if (scrollview.contentoffset.x == cgfloat(self.imagenamelist.count + 1) * kscreenwidth) { scrollview.contentoffset = cgpoint(x: kscreenwidth,y: 0) self.pagecontrol.currentpage = 0} else { self.pagecontrol.currentpage = int(scrollview.contentoffset.x / kscreenwidth) - 1}} |
其實原理很簡單,個人認為使用uicollectionview實現無限輪播比起uiscrollview更加實用并且便于維護,接下來我將代碼全部列一下:
|
1
2
3
4
5
6
7
8
9
10
11
12
13
14
15
16
17
18
19
20
21
22
23
24
25
26
27
28
29
30
31
32
33
34
35
36
37
38
39
40
41
42
43
44
45
46
47
48
49
50
51
52
53
54
55
56
57
58
59
60
61
62
63
64
65
66
67
68
69
70
71
72
73
74
75
76
77
78
79
80
81
82
83
84
85
86
87
88
89
90
91
92
93
94
95
96
97
98
99
100
101
102
103
104
105
106
107
108
109
110
111
112
113
114
115
116
117
118
119
120
121
122
123
124
125
126
127
128
129
130
131
132
133
134
135
|
import uikitlet kscreenwidth = uiscreen.main.bounds.widthclass viewcontroller: uiviewcontroller { lazy var collectionview: uicollectionview = { let flowlayout = uicollectionviewflowlayout() flowlayout.minimumlinespacing = 0 flowlayout.minimuminteritemspacing = 0 flowlayout.scrolldirection = .horizontal flowlayout.itemsize = cgsize(width: kscreenwidth, height: 200) let collectionview = uicollectionview(frame: cgrect(x: 0, y: 0, width: uiscreen.main.bounds.width, height: 200), collectionviewlayout: flowlayout) collectionview.ispagingenabled = true collectionview.showshorizontalscrollindicator = false collectionview.backgroundcolor = uicolor.white collectionview.delegate = self collectionview.datasource = self self.view.addsubview(collectionview) return collectionview }() lazy var pagecontrol: uipagecontrol = { let pagecontrol = uipagecontrol(frame: cgrect(x: 0, y: 150, width: kscreenwidth, height: 50)) pagecontrol.numberofpages = self.imagenamelist.count pagecontrol.currentpage = 0 pagecontrol.tintcolor = uicolor.black pagecontrol.pageindicatortintcolor = uicolor.gray; return pagecontrol; }() lazy var imagenamelist: [string] = { let imagelist = ["image0", "image1", "image2", "image3"] return imagelist }() override func viewdidload() { super.viewdidload() setupcontroller() } func setupcontroller() { /// 設置數據 collectionview.register(imagecollectionviewcell.self, forcellwithreuseidentifier: "imagecollectionviewcell") collectionview.reloaddata() collectionview.scrolltoitem(at: indexpath(row: 1, section: 0), at: .left, animated: false) self.view.addsubview(pagecontrol) }}extension viewcontroller: uicollectionviewdatasource { func collectionview(_ collectionview: uicollectionview, numberofitemsinsection section: int) -> int { /// 這步只是防止崩潰 if (imagenamelist.count == 0) { return 0 } return imagenamelist.count + 2 } func collectionview(_ collectionview: uicollectionview, cellforitemat indexpath: indexpath) -> uicollectionviewcell { let cell = collectionview.dequeuereusablecell(withreuseidentifier: "imagecollectionviewcell", for: indexpath) as! imagecollectionviewcell /// 給圖片賦值(在首尾分別添加兩張圖片) if (indexpath.row == 0) { cell.imagename = imagenamelist.last } else if (indexpath.row == self.imagenamelist.count + 1) { cell.imagename = imagenamelist.first } else { cell.imagename = imagenamelist[indexpath.row - 1] } return cell } }extension viewcontroller: uicollectionviewdelegate { func scrollviewdidenddecelerating(_ scrollview: uiscrollview) { /// 當uiscrollview滑動到第一位停止時,將uiscrollview的偏移位置改變 if (scrollview.contentoffset.x == 0) { scrollview.contentoffset = cgpoint(x: cgfloat(self.imagenamelist.count) * kscreenwidth,y: 0) self.pagecontrol.currentpage = self.imagenamelist.count /// 當uiscrollview滑動到最后一位停止時,將uiscrollview的偏移位置改變 } else if (scrollview.contentoffset.x == cgfloat(self.imagenamelist.count + 1) * kscreenwidth) { scrollview.contentoffset = cgpoint(x: kscreenwidth,y: 0) self.pagecontrol.currentpage = 0 } else { self.pagecontrol.currentpage = int(scrollview.contentoffset.x / kscreenwidth) - 1 } } }/// collectionview圖片的cellclass imagecollectionviewcell: uicollectionviewcell { /// 顯示的圖片 let imageview = uiimageview() var imagename: string? = "" { didset { if let name = imagename { imageview.image = uiimage(named: name) } } } override init(frame: cgrect) { super.init(frame: frame) setupcell(); } /// 初始化視圖 func setupcell() { imageview.frame = self.bounds contentview.addsubview(imageview) } required init?(coder adecoder: nscoder) { fatalerror("init(coder:) has not been implemented") } } |
ok,喜歡的話可以點一下收藏哈,用uiscrollview實現輪播的原理在:http://www.ythuaji.com.cn/article/163332.html,大家需要的話也可以了解一下。
總結
以上就是這篇文章的全部內容了,希望本文的內容對大家的學習或者工作具有一定的參考學習價值,如果有疑問大家可以留言交流,謝謝大家對服務器之家的支持。
原文鏈接:https://www.jianshu.com/p/0ba33e59a784


