idea配置springboot熱部署終極解決辦法,解決熱部署失效問題
1. 添加maven依賴
|
1
2
3
4
5
6
|
<dependency> <groupId>org.springframework.boot</groupId> <artifactId>spring-boot-devtools</artifactId> <version>2.2.5.RELEASE</version> <optional>true</optional> </dependency> |
2. 添加插件
|
1
2
3
4
5
6
7
8
9
|
<plugin> <groupId>org.springframework.boot</groupId> <artifactId>spring-boot-maven-plugin</artifactId> <version>2.2.5.RELEASE</version> <configuration> <fork>true</fork> <addResources>true</addResources> </configuration> </plugin> |
3.開啟自動編譯
- Ctrl+Alt+S打開配置
- 設置自動編譯
File-Settings-Compiler-Build Project automatically

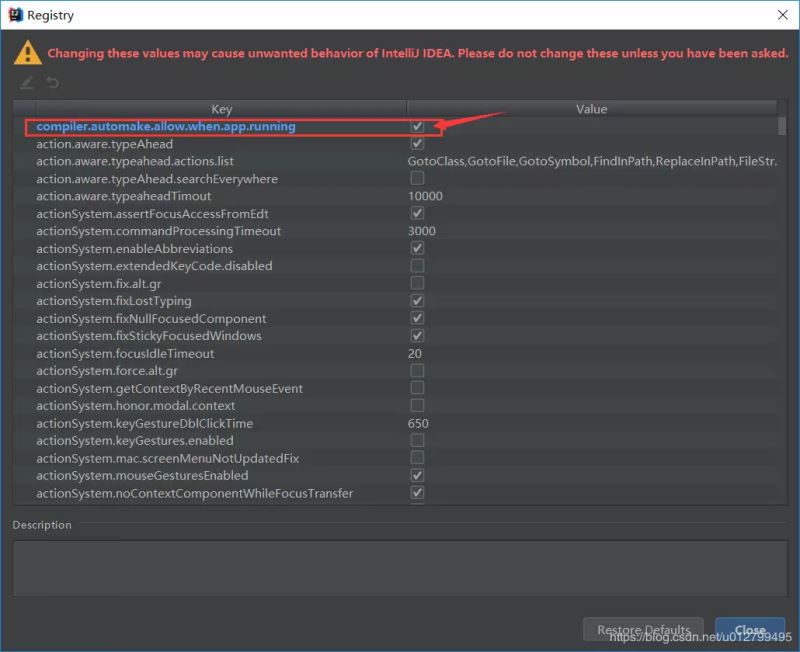
4.Ctrl+Shift+Alt+/ 選擇Registry

找到選項Compiler autoMake allow when app running打勾

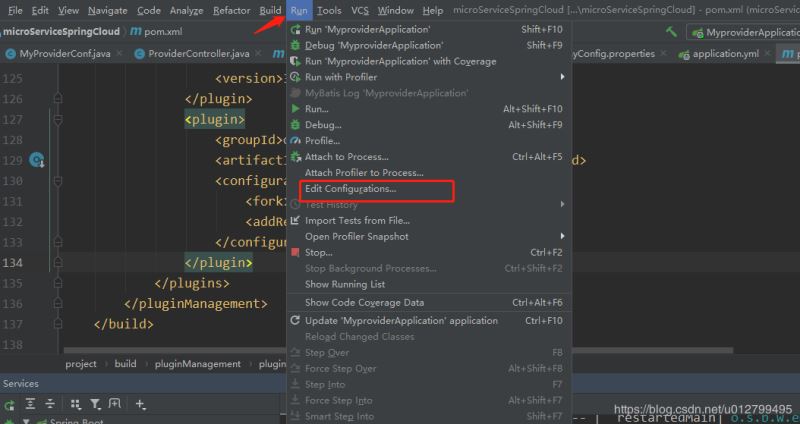
5.設置項目啟動加載方式菜單欄選擇 Run->Edit Configurations…

找到spring boot下的 On ‘Update' action 和 On frame deactivation ,選擇 Update classes and resources
(注意:這步非常重要)

最后測試熱部署,隨便修改一個類中的代碼,查看idea最下方的提示條,出現 build 后 緊接著 出現 parsing java… 表示正在重新編譯,等待項目自動重新啟動后就可以看見修改的類生效了

PS:下面看下SpringBoot在idea中配置熱部署
導入熱部署jar包
|
1
2
3
4
|
<dependency> <groupId>org.springframework.boot</groupId> <artifactId>spring-boot-devtools</artifactId></dependency> |
IDEA使用:
- 修改了java類的地方,使用Ctrl+Shift+F9進行熱更新
- 靜態頁面/模板頁面,使用Ctrl+F9進行熱更新
- 快捷鍵使用后不生效?前往File-Settings-Compiler-Build Project automatically選項開始idea自動編譯
到此這篇關于idea配置springboot熱部署終極解決辦法(解決熱部署失效問題)的文章就介紹到這了,更多相關idea配置springboot熱部署內容請搜索服務器之家以前的文章或繼續瀏覽下面的相關文章希望大家以后多多支持服務器之家!
原文鏈接:https://blog.csdn.net/u012799495/article/details/104804295/


