Spring Boot缺省錯誤視圖解析器
Web應用在處理請求的過程中發生錯誤是非常常見的情況,SpringBoot中為我們實現了一個錯誤視圖解析器(DefaultErrorViewResolver)。它基于一些常見的約定,嘗試根據HTTP錯誤狀態碼解析出錯誤處理視圖。它會在目錄/error下針對提供的HTTP錯誤狀態碼搜索模板或者靜態資源,比如,給定了HTTP狀態碼404,它會嘗試搜索如下模板或者靜態資源:
- /<templates>/error/404.<ext> - 這里<templates>表示所配置的模板所在目錄,<ext>表示所用的模板的文件名
- /<static>/error/404.html- 這里<static>表示靜態資源文件所在路徑、
- /<templates>/error/4xx.<ext>
- /<static>/error/4xx.html
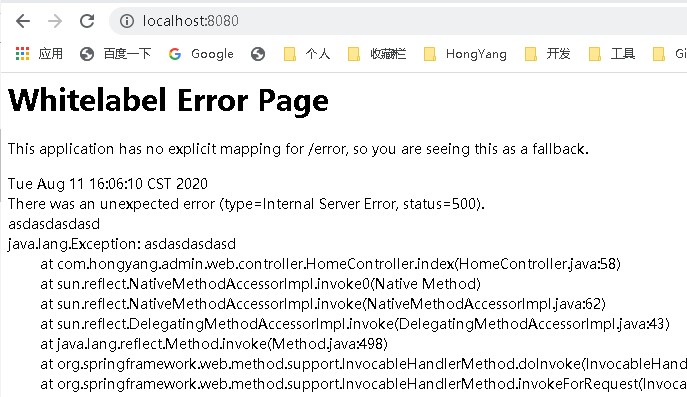
如果找不到就用默認的白標錯誤視圖,如下圖所示:

因此,為了給用戶最佳的使用體驗,404等常見錯誤需要我們自定義頁面來處理。以下是幾種自定義錯誤頁面的方式。
方式1. 定義靜態的錯誤頁面
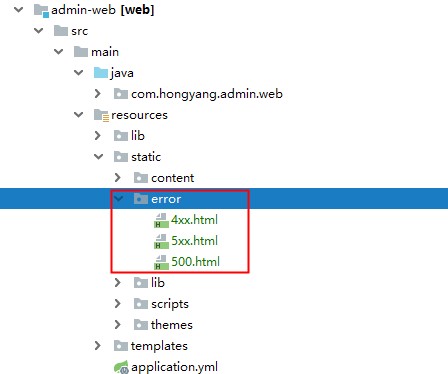
在 resources 下的 static 目錄下,新建 error 目錄,在其中新建各種靜態錯誤頁面,如 404、500,也可以模糊處理,如4xx、5xx 等,當程序運行出錯時,會自動根據錯誤代碼(如500)找到相應的錯誤頁面(如/static/error/500.html),給予展示。

方式2. 定義動態的錯誤頁面(有采用模板引擎)
在有使用模板的情況下,SpringBoot缺省的錯誤視圖解析器也會在/<templates>/error下搜索錯誤展示視圖。我們可以使用項目中的視圖模板引擎在錯誤頁面來定制展示我們的錯誤消息。
1) 在 resources 下的 templates 目錄下,新建 error 目錄,在其中新建各種靜態錯誤頁面,如 404、500,也可以模糊處理,如4xx、5xx等(與方式1一致)+

在模板引擎的支持下可以取到錯誤的一些信息,并定制化顯示在頁面上,如下(freemarker模板):

錯誤信息定制:
- timestamp:時間戳
- status:狀態碼
- error:錯誤提示
- exception:異常對象
- trace:跟蹤流程日志,404狀態下無
- message:異常消息
- path:請求路徑
方式3. 自定義實現錯誤視圖解析,統一錯誤處理
如果不想要使用缺省的錯誤處理視圖解析器,想要定制一些自己的東西(比如說:錯誤引導信息等),按照官方文檔的建議我們可以自定義實現錯誤視圖解析接口來處理。
下面就是通過實現錯誤視圖解析接口ErrorViewResolver,將4xx、5xx的錯誤頁面集中在一個自定義視圖上:
1)實現 ErrorViewResolver 接口
|
1
2
3
4
5
6
7
8
9
10
11
12
13
14
15
16
17
18
19
20
21
22
23
24
25
26
27
28
|
package com.hongyang.admin.web;import org.springframework.boot.autoconfigure.web.servlet.error.ErrorViewResolver;import org.springframework.http.HttpStatus;import org.springframework.stereotype.Component;import org.springframework.web.servlet.ModelAndView;import javax.servlet.http.HttpServletRequest;import java.util.Map;/** * 實現自定義的錯誤視圖解析器 */@Componentpublic class AdminErrorViewResolver implements ErrorViewResolver { /** * 實現ErrorViewResolver約定方法, * 返回統一的錯誤視圖. * @param request * @param status * @param model * @return */ @Override public ModelAndView resolveErrorView(HttpServletRequest request, HttpStatus status, Map<String, Object> model) { return new ModelAndView("/error/index", model); }} |
2)完成錯誤視圖,在templates/error下添加index.ftlh視圖(freemarker模板)
|
1
2
3
4
5
6
7
8
9
10
11
12
13
14
15
16
17
18
19
20
21
22
23
24
25
26
27
28
29
30
31
32
33
34
35
36
37
38
39
40
41
42
43
44
45
46
47
48
49
50
51
52
53
54
55
56
57
58
59
60
61
62
63
64
65
66
67
68
69
70
71
72
73
74
75
76
77
78
79
80
81
82
83
84
85
86
87
88
89
90
91
92
93
94
95
96
97
98
99
100
101
102
103
104
105
106
107
108
109
110
111
112
113
114
115
116
117
118
119
120
121
122
123
124
125
126
127
128
129
130
131
132
133
134
135
136
137
138
139
140
141
142
143
144
145
146
147
148
149
150
151
152
153
154
155
156
157
158
159
160
161
162
163
164
165
166
167
168
169
170
171
172
173
174
175
176
177
178
179
180
181
182
183
184
185
186
187
188
189
190
|
<!DOCTYPE html><html><head > <link href="/content/public/images/logo-small.png" rel="external nofollow" rel="shortcut icon" /> <meta http-equiv="Content-Type" content="text/html; charset=UTF-8"> <title>${status}</title> <meta name="renderer" content="webkit"> <meta http-equiv="X-UA-Compatible" content="IE=edge,chrome=1"> <meta name="viewport" content="width=device-width, initial-scale=1, maximum-scale=1"> <meta name="apple-mobile-web-app-status-bar-style" content="black"> <meta name="apple-mobile-web-app-capable" content="yes"> <meta name="format-detection" content="telephone=no"> <style> body { position: fixed; z-index: 10; top: 0; left: 0; right: 0; bottom: 0; width: 100%; padding: 0; margin: 0px; font-size: 14px; background: #fff; word-wrap: break-word; } p { padding: 0 15px; } .btn { border: 0px; color: #fff; cursor: pointer; text-align: center; background-color: #ff7a5f\0; box-shadow: #cccccc 0 2px 15px 0; -webkit-box-shadow: 0 2px 7px 0 rgba(0,0,0,0.2); background: radial-gradient(circle at 300% 50%, rgb(255, 195, 114) 50%, rgb(255, 105, 90) 100%); transition: all .2s ease-out,box-shadow .2s ease-out; } .btn:hover { color: #FFFFFF; transform: scale(1.1); } .btn:focus { outline: none; } .container { margin: 8% auto; } .container p { margin: 35px auto; text-align: center; } .container img { width: 20%; } .container .font { color: #848484; } .container .btn-back { width: 180px; height: 35px; border-radius: 6px; } #container-info { display: none; position: fixed; z-index: 11; top: 5%; left: 0; right: 0; margin: 0 auto; width: 65%; height: 85%; overflow: hidden; border-radius: 4px; border: 1px solid #f1986e; background-color: #fff; box-shadow: inset 0 1px 1px rgba(0,0,0,.075), 0 0 8px rgb(242, 154, 110); } #container-info .btn-close { position: absolute; right: 5px; top: 5px; width: 25px; height: 25px; line-height: 25px; font-size: 22px; padding: 2px; border-radius: 50%; text-align: center; } #container-info p { font-size: 12px; line-height: 20px; } .show { display: block !important; } .cor-r { color: red; } @media (max-width: 767px) { .container img { width: 50%; } #container-info { width: 85%; } } .panel-heading { height: 32px; line-height: 32px; padding: 5px 15px; } .panel-body { height: calc(85vh - 40px); overflow: auto; } .panel-orange .panel-heading { background-color: #ffa0681f; color: #ff6f5c; } </style></head><body><form id="form1" > <div class="container"> <p><img src="/content/public/images/error_${status}.png"/></p> <p class="font">${error},<a onclick="errorDetail(true)" href="javascript: void(0)" rel="external nofollow" >點擊查看明細</a>!</p> <p><button type="button" class="btn btn-back" id="btnBack" >返回</button></p> </div> <div id="container-info"> <span class="btn btn-close" onclick="errorDetail(false)">×</span> <div class="panel panel-orange"> <div class="panel-heading"> 錯誤說明 </div> <div class="panel-body"> <#if path??> <p><b>請求的URL:</b>${path}</p> </#if> <#if message??> <p><b>異常信息:</b><span class="cor-r">${message}</span></p> </#if> <#if trace??> <p><b>StackTrace:</b><br>${trace}</p> </#if> </div> </div> </div> <script type="text/javascript"> window.onload = function () { var btn = document.getElementById("btnBack"); btn.onclick = function () { var url = document.referrer; if (url.indexOf("home/main") > 0) { window.parent.tabDelete(); return; } window.history.back(-1); } } function errorDetail(isShow) { var con = document.getElementById("container-info"); con.className = isShow ? "show" : ""; // 兼容IE8 } </script></form></body></html> |
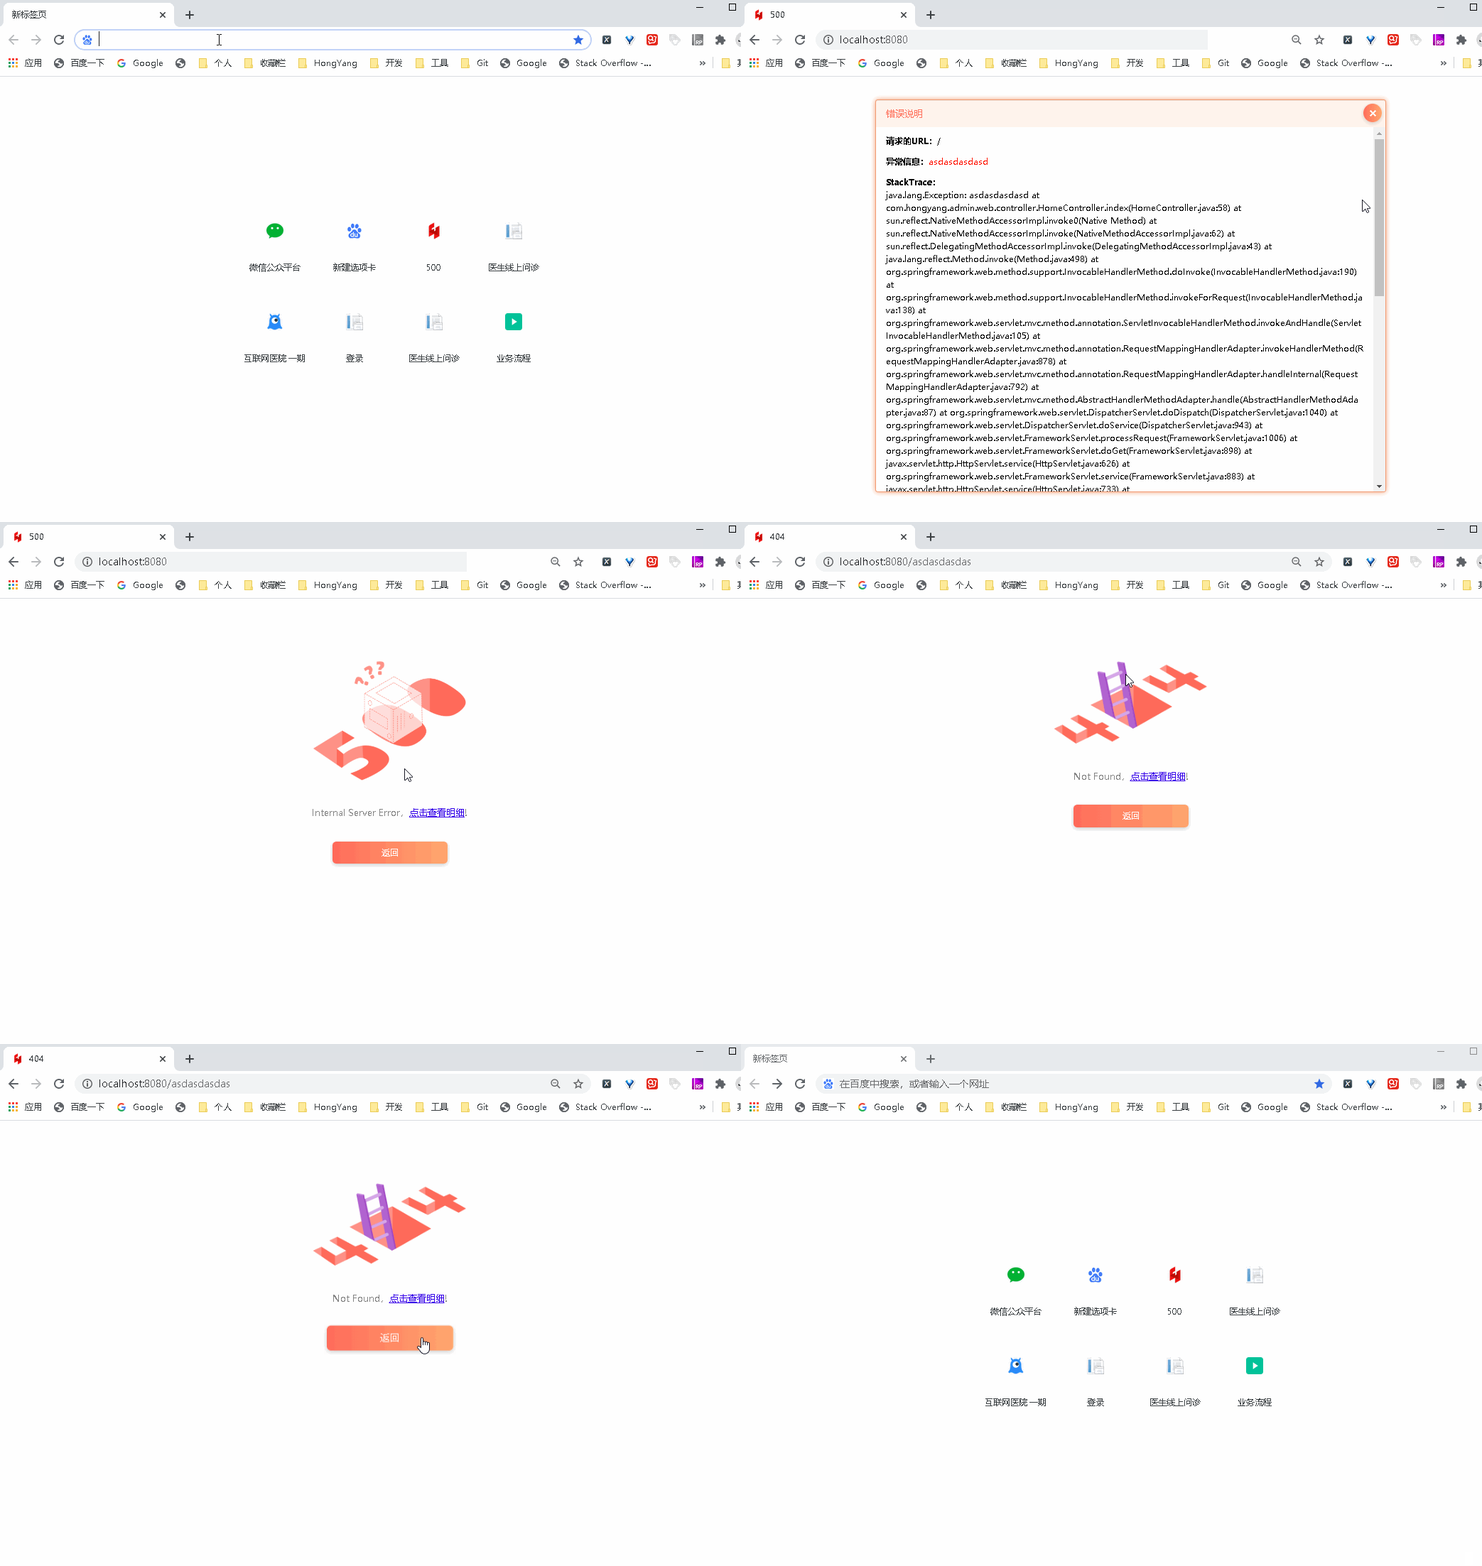
3)最后效果

錯誤頁面的展示優先級
1、精確大于模糊
2、動態大于靜態
總結
到此這篇關于Spring Boot自定義錯誤視圖的方法詳解的文章就介紹到這了,更多相關springboot自定義錯誤視圖內容請搜索服務器之家以前的文章或繼續瀏覽下面的相關文章希望大家以后多多支持服務器之家!
原文鏈接:https://www.cnblogs.com/anayigeren/p/13479442.html


