前言
綁定阿里云域名,創建域名賬戶,并配置解析域名賬戶,獲得發送郵箱的權限,上限兩百封,超出要¥…
阿里云郵件推送控制臺
https://www.aliyun.com/product/directmail
申請郵箱并解析域名
https://yq.aliyun.com/articles/707997
1. 郵箱信息實體類
|
1
2
3
4
5
6
7
8
9
10
11
12
13
14
15
16
17
18
19
20
21
22
23
24
25
26
27
28
29
30
31
32
33
34
35
36
37
38
39
40
41
42
43
44
45
46
47
48
49
50
51
52
53
54
55
56
57
58
59
60
61
62
63
64
65
66
67
68
69
70
71
72
73
74
75
76
77
78
79
80
81
82
83
84
85
86
87
88
89
90
91
92
93
94
95
96
97
98
|
package cn.bitqian.mail.test;/** * 郵件內容實體類 * @author echo lovely * @date 2020/9/18 15:47 */public class MailInfo { // 發件人賬戶 private String sendEmailAccount; // 發件人密碼 private String sendEmailPassword; // 收件人賬戶 private String receiveMailAccount; // 發送人姓名 private String sendPersonName; // 收件人姓名 private String receivePersonName; // 郵件標題 private String mailTitle; // 郵件正文 private String mailContent; public MailInfo(String sendEmailAccount, String sendEmailPassword, String receiveMailAccount, String sendPersonName, String receivePersonName, String mailTitle, String mailContent) { this.sendEmailAccount = sendEmailAccount; this.sendEmailPassword = sendEmailPassword; this.receiveMailAccount = receiveMailAccount; this.sendPersonName = sendPersonName; this.receivePersonName = receivePersonName; this.mailTitle = mailTitle; this.mailContent = mailContent; } public String getSendEmailAccount() { return sendEmailAccount; } public void setSendEmailAccount(String sendEmailAccount) { this.sendEmailAccount = sendEmailAccount; } public String getSendEmailPassword() { return sendEmailPassword; } public void setSendEmailPassword(String sendEmailPassword) { this.sendEmailPassword = sendEmailPassword; } public String getReceiveMailAccount() { return receiveMailAccount; } public void setReceiveMailAccount(String receiveMailAccount) { this.receiveMailAccount = receiveMailAccount; } public String getMailTitle() { return mailTitle; } public void setMailTitle(String mailTitle) { this.mailTitle = mailTitle; } public String getMailContent() { return mailContent; } public void setMailContent(String mailContent) { this.mailContent = mailContent; } public String getSendPersonName() { return sendPersonName; } public void setSendPersonName(String sendPersonName) { this.sendPersonName = sendPersonName; } public String getReceivePersonName() { return receivePersonName; } public void setReceivePersonName(String receivePersonName) { this.receivePersonName = receivePersonName; }} |
2. jar包依賴
|
1
2
3
4
5
6
7
8
9
10
11
12
13
|
<dependency> <groupId>junit</groupId> <artifactId>junit</artifactId> <version>4.11</version> <scope>test</scope></dependency><!-- mail dependency --><dependency> <groupId>com.sun.mail</groupId> <artifactId>javax.mail</artifactId> <version>1.6.2</version></dependency> |
3. 發送郵箱實現
注意:
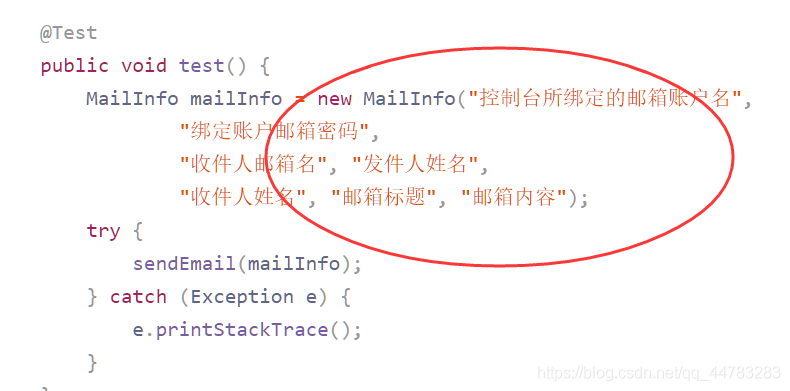
1. 更改下面的屬性,與實體類對應

代碼實現
|
1
2
3
4
5
6
7
8
9
10
11
12
13
14
15
16
17
18
19
20
21
22
23
24
25
26
27
28
29
30
31
32
33
34
35
36
37
38
39
40
41
42
43
44
45
46
47
48
49
50
51
52
53
54
55
56
57
58
59
60
61
62
63
64
65
66
67
68
69
70
71
72
73
74
75
76
77
78
79
80
81
82
83
84
85
86
87
88
89
90
91
|
package cn.bitqian.mail.test;import org.junit.Test;import javax.mail.Session;import javax.mail.Transport;import javax.mail.internet.InternetAddress;import javax.mail.internet.MimeMessage;import java.util.Date;import java.util.Properties;/** * 郵件發送工具類 * @author echo lovely * @date 2020/9/18 15:54 */public class MailSendUtils { // 郵箱smtp協議 這里是使用阿里云的 public static final String myEmailSMTPHost = "smtpdm.aliyun.com"; @Test public void test() { MailInfo mailInfo = new MailInfo("控制臺所綁定的郵箱賬戶名", "綁定賬戶郵箱密碼", "收件人郵箱名", "發件人姓名", "收件人姓名", "郵箱標題", "郵箱內容"); try { sendEmail(mailInfo); } catch (Exception e) { e.printStackTrace(); } } public void sendEmail(MailInfo mailInfo) throws Exception { // 1. 創建參數配置, 用于連接郵件服務器的參數配置 Properties props = new Properties(); // 參數配置 props.setProperty("mail.transport.protocol", "smtp"); // 使用的協議(JavaMail規范要求) props.setProperty("mail.smtp.host", myEmailSMTPHost); // 發件人的郵箱的 SMTP 服務器地址 props.setProperty("mail.smtp.auth", "true"); // 需要請求認證 // 2. 根據配置創建會話對象, 用于和郵件服務器交互 Session session = Session.getInstance(props); session.setDebug(true); // 設置為debug模式, 可以查看詳細的發送 log // 3. 創建一封郵件 MimeMessage message = new MailSendUtils().createMimeMessage(session, mailInfo); // 4. 根據 Session 獲取郵件傳輸對象 Transport transport = session.getTransport(); // 5. 使用 郵箱賬號 和 密碼 連接郵件服務器, 這里認證的郵箱必須與 message 中的發件人郵箱一致, 否則報錯 transport.connect(mailInfo.getSendEmailAccount(), mailInfo.getSendEmailPassword()); // 6. 發送郵件, 發到所有的收件地址, message.getAllRecipients() 獲取到的是在創建郵件對象時添加的所有收件人, 抄送人, 密送人 transport.sendMessage(message, message.getAllRecipients()); // 7. 關閉連接 transport.close(); } public MimeMessage createMimeMessage(Session session, MailInfo mailInfo) throws Exception { // 1. 創建一封郵件 MimeMessage message = new MimeMessage(session); // 2. From: 發件人(昵稱有廣告嫌疑,避免被郵件服務器誤認為是濫發廣告以至返回失敗,請修改昵稱) message.setFrom(new InternetAddress(mailInfo.getSendEmailAccount(), mailInfo.getSendPersonName(), "UTF-8")); // 3. To: 收件人(可以增加多個收件人、抄送、密送) message.setRecipient(MimeMessage.RecipientType.TO, new InternetAddress(mailInfo.getReceiveMailAccount(), mailInfo.getReceivePersonName(), "UTF-8")); // 4. Subject: 郵件主題(標題有廣告嫌疑,避免被郵件服務器誤認為是濫發廣告以至返回失敗,請修改標題) message.setSubject(mailInfo.getMailTitle(), "UTF-8"); // 5. Content: 郵件正文(可以使用html標簽)(內容有廣告嫌疑,避免被郵件服務器誤認為是濫發廣告以至返回失敗,請修改發送內容) message.setContent(mailInfo.getMailContent(), "text/html;charset=UTF-8"); // 6. 設置發件時間 message.setSentDate(new Date()); // 7. 保存設置 message.saveChanges(); return message; }} |
總結
到此這篇關于Java實現郵箱發送功能(阿里云郵箱推送)的文章就介紹到這了,更多相關Java郵箱發送(阿里云郵箱推送)內容請搜索服務器之家以前的文章或繼續瀏覽下面的相關文章希望大家以后多多支持服務器之家!
原文鏈接:https://blog.csdn.net/qq_44783283/article/details/108669051


