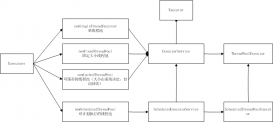
FileInputStream 和 FileOutputStream 介紹
FileInputStream 是文件輸入流,它繼承于InputStream。
通常,我們使用FileInputStream從某個文件中獲得輸入字節。
FileOutputStream 是文件輸出流,它繼承于OutputStream。
通常,我們使用FileOutputStream 將數據寫入 File 或 FileDescriptor 的輸出流。
FileInputStream 函數接口
|
1
2
3
4
5
6
7
8
9
10
|
FileInputStream(File file) // 構造函數1:創建“File對象”對應的“文件輸入流”FileInputStream(FileDescriptor fd) // 構造函數2:創建“文件描述符”對應的“文件輸入流”FileInputStream(String path) // 構造函數3:創建“文件(路徑為path)”對應的“文件輸入流”int available() // 返回“剩余的可讀取的字節數”或者“skip的字節數”void close() // 關閉“文件輸入流”FileChannel getChannel() // 返回“FileChannel”final FileDescriptor getFD() // 返回“文件描述符”int read() // 返回“文件輸入流”的下一個字節int read(byte[] buffer, int byteOffset, int byteCount) // 讀取“文件輸入流”的數據并存在到buffer,從byteOffset開始存儲,存儲長度是byteCount。long skip(long byteCount) // 跳過byteCount個字節 |
FileOutputStream 函數接口
|
1
2
3
4
5
6
7
8
9
10
|
FileOutputStream(File file) // 構造函數1:創建“File對象”對應的“文件輸入流”;默認“追加模式”是false,即“寫到輸出的流內容”不是以追加的方式添加到文件中。FileOutputStream(File file, boolean append) // 構造函數2:創建“File對象”對應的“文件輸入流”;指定“追加模式”。FileOutputStream(FileDescriptor fd) // 構造函數3:創建“文件描述符”對應的“文件輸入流”;默認“追加模式”是false,即“寫到輸出的流內容”不是以追加的方式添加到文件中。FileOutputStream(String path) // 構造函數4:創建“文件(路徑為path)”對應的“文件輸入流”;默認“追加模式”是false,即“寫到輸出的流內容”不是以追加的方式添加到文件中。FileOutputStream(String path, boolean append) // 構造函數5:創建“文件(路徑為path)”對應的“文件輸入流”;指定“追加模式”。void close() // 關閉“輸出流”FileChannel getChannel() // 返回“FileChannel”final FileDescriptor getFD() // 返回“文件描述符”void write(byte[] buffer, int byteOffset, int byteCount) // 將buffer寫入到“文件輸出流”中,從buffer的byteOffset開始寫,寫入長度是byteCount。void write(int oneByte) // 寫入字節oneByte到“文件輸出流”中 |
示例程序
關于FileInputStream和FileOutputStream的API用法,參考示例代碼(FileStreamTest.java):
|
1
2
3
4
5
6
7
8
9
10
11
12
13
14
15
16
17
18
19
20
21
22
23
24
25
26
27
28
29
30
31
32
33
34
35
36
37
38
39
40
41
42
43
44
45
46
47
48
49
50
51
52
53
54
55
56
57
58
59
60
61
62
63
64
65
66
67
68
69
70
71
72
73
74
75
76
77
78
79
80
81
82
83
84
85
86
87
88
89
90
91
92
93
94
|
import java.io.File;import java.io.FileDescriptor;import java.io.FileInputStream;import java.io.FileOutputStream;import java.io.BufferedInputStream;import java.io.BufferedOutputStream;import java.io.PrintStream;;import java.io.IOException;/*** FileInputStream 和FileOutputStream 測試程序** */public class FileStreamTest { private static final String FileName = "file.txt"; public static void main(String[] args) { testWrite(); testRead(); } /** * FileOutputStream 演示函數 * * 運行結果: * 在源碼所在目錄生成文件"file.txt",文件內容是“abcdefghijklmnopqrstuvwxyz” * * 加入,我們將 FileOutputStream fileOut2 = new FileOutputStream(file, true); * 修改為 FileOutputStream fileOut2 = new FileOutputStream(file, false); * 然后再執行程序,“file.txt”的內容變成"0123456789"。 * 原因是: * (01) FileOutputStream fileOut2 = new FileOutputStream(file, true); * 它是以“追加模式”將內容寫入文件的。即寫入的內容,追加到原始的內容之后。 * (02) FileOutputStream fileOut2 = new FileOutputStream(file, false); * 它是以“新建模式”將內容寫入文件的。即刪除文件原始的內容之后,再重新寫入。 */ private static void testWrite() { try { // 創建文件“file.txt”對應File對象 File file = new File(FileName); // 創建文件“file.txt”對應的FileOutputStream對象,默認是關閉“追加模式” FileOutputStream fileOut = new FileOutputStream(file); // 創建FileOutputStream對應的PrintStream,方便操作。PrintStream的寫入接口更便利 PrintStream out1 = new PrintStream(fileOut1); // 向“文件中”寫入26個字母 out1.print("abcdefghijklmnopqrstuvwxyz"); out1.close(); // 創建文件“file.txt”對應的FileOutputStream對象,打開“追加模式” FileOutputStream fileOut2 = new FileOutputStream(file, true); // 創建FileOutputStream對應的PrintStream,方便操作。PrintStream的寫入接口更便利 PrintStream out2 = new PrintStream(fileOut2); // 向“文件中”寫入"0123456789"+換行符 out2.println("0123456789"); out2.close(); } catch(IOException e) { e.printStackTrace(); } } /** * FileInputStream 演示程序 */ private static void testRead() { try { // 方法:新建FileInputStream對象 // 新建文件“file.txt”對應File對象 File file = new File(FileName); FileInputStream in1 = new FileInputStream(file); // 方法2:新建FileInputStream對象 FileInputStream in2 = new FileInputStream(FileName); // 方法3:新建FileInputStream對象 // 獲取文件“file.txt”對應的“文件描述符” FileDescriptor fdin = in2.getFD(); // 根據“文件描述符”創建“FileInputStream”對象 FileInputStream in3 = new FileInputStream(fdin); // 測試read(),從中讀取一個字節 char c1 = (char)in1.read(); System.out.println("c1="+c1); // 測試skip(long byteCount),跳過4個字節 in1.skip(25); // 測試read(byte[] buffer, int byteOffset, int byteCount) byte[] buf = new byte[10]; in1.read(buf, 0, buf.length); System.out.println("buf="+(new String(buf))); // 創建“FileInputStream”對象對應的BufferedInputStream BufferedInputStream bufIn = new BufferedInputStream(in3); // 讀取一個字節 char c2 = (char)bufIn.read(); System.out.println("c2="+c2); in1.close(); in2.close(); in3.close(); } catch(IOException e) { e.printStackTrace(); } }} |
運行結果:
|
1
2
3
|
c1=abuf=0123456789c2=a |
結果說明:
運行程序,會在源碼所在位置新生成一個文件“file.txt”。它的內容是“abcdefghijklmnopqrstuvwxyz0123456789”。
以上所述是小編給大家介紹的Java中的FileInputStream 和 FileOutputStream 介紹,希望對大家有所幫助,如果大家有任何疑問請給我留言,小編會及時回復大家的。在此也非常感謝大家對服務器之家網站的支持!


