本文主要講解Go語言中的函數式編程概念和使用,分享給大家,具體如下:
主要知識點:
- Go語言對函數式編程的支持主要體現在閉包上面
- 閉包就是能夠讀取其他函數內部變量的函數。只有函數內部的子函數才能讀取局部變量,所以閉包可以理解成“定義在一個函數內部的函數“。在本質上,閉包是將函數內部和函數外部連接起來的橋梁。
- 學習閉包的基本使用
- 標準的閉包具有不可變性:不能有狀態,只能有常量和函數,而且函數只能有一個參數,但是一般可以不用嚴格遵守
- 使用閉包 實現 斐波那契數列
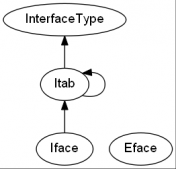
- 學習理解函數實現接口
- 使用函數遍歷二叉樹
具體代碼示例如下:
|
1
2
3
4
5
6
7
8
9
10
11
12
13
14
15
16
17
18
19
20
21
22
23
24
25
26
27
28
29
30
31
32
33
34
35
36
37
38
39
40
41
42
43
44
45
46
47
48
49
50
51
52
53
54
55
56
57
58
59
60
61
62
63
64
65
66
67
68
69
70
71
72
73
74
75
76
77
78
79
80
|
package mainimport ( "fmt" "io" "strings" "bufio")//普通閉包func adder() func(int) int { sum := 0 return func(v int) int { sum += v return sum }}//無狀態 無變量的閉包type iAdder func(int) (int, iAdder)func adder2(base int) iAdder { return func(v int) (int, iAdder) { return base + v, adder2(base + v) }}//使用閉包實現 斐波那契數列func Fibonacci() func() int { a, b := 0, 1 return func() int { a, b = b, a+b return a }}//為函數 實現 接口,將上面的方法 當作一個文件進行讀取type intGen func() int//為所有上面這種類型的函數 實現接口func (g intGen) Read( p []byte) (n int, err error) { next := g() if next > 10000 { return 0, io.EOF } s := fmt.Sprintf("%d\n", next) // TODO: incorrect if p is too small! return strings.NewReader(s).Read(p)}//通過 Reader讀取文件func printFileContents(reader io.Reader) { scanner := bufio.NewScanner(reader) for scanner.Scan() { fmt.Println(scanner.Text()) }}func main() { //普通閉包調用 a := adder() for i := 0; i < 10; i++ { var s int =a(i) fmt.Printf("0 +...+ %d = %d\n",i, s) } //狀態 無變量的閉包 調用 b := adder2(0) for i := 0; i < 10; i++ { var s int s, b = b(i) fmt.Printf("0 +...+ %d = %d\n",i, s) } //調用 斐波那契數列 生成 fib:=Fibonacci() fmt.Println(fib(),fib(),fib(),fib(),fib(),fib(),fib(),fib()) var f intGen = Fibonacci() printFileContents(f)} |
以下代碼演示函數遍歷二叉樹:
|
1
2
3
4
5
6
7
8
9
10
11
12
13
14
15
16
17
18
19
20
21
22
23
24
25
26
27
28
29
30
31
32
33
34
35
36
37
38
39
40
41
42
43
44
45
46
47
48
49
50
51
52
53
54
55
56
57
58
59
60
|
package mainimport "fmt"type Node struct { Value int Left, Right *Node}func (node Node) Print() { fmt.Print(node.Value, " ")}func (node *Node) SetValue(value int) { if node == nil { fmt.Println("Setting Value to nil " + "node. Ignored.") return } node.Value = value}func CreateNode(value int) *Node { return &Node{Value: value}}//為 TraverseFunc 方法提供 實現func (node *Node) Traverse() { node.TraverseFunc(func(n *Node) { n.Print() }) fmt.Println()}//為 Node 結構增加一個方法 TraverseFunc ,//此方法 傳入一個方法參數,在遍歷是執行func (node *Node) TraverseFunc(f func(*Node)) { if node == nil { return } node.Left.TraverseFunc(f) f(node) node.Right.TraverseFunc(f)}func main() { var root Node root = Node{Value: 3} root.Left = &Node{} root.Right = &Node{5, nil, nil} root.Right.Left = new(Node) root.Left.Right = CreateNode(2) root.Right.Left.SetValue(4) root.Traverse() // 進行了 打印封裝 //以下通過匿名函數,實現了 自定義實現 nodeCount := 0 root.TraverseFunc(func(node *Node) { nodeCount++ }) fmt.Println("Node count:", nodeCount) //Node count: 5} |
以上就是本文的全部內容,希望對大家的學習有所幫助,也希望大家多多支持服務器之家。
原文鏈接:https://my.oschina.net/ruoli/blog/1815740