Java 使用微信支付
前言百度搜了一下微信支付,都描述的不太好,于是乎打算自己寫一個案例,希望以后拿來直接改造使用。
因為涉及二維碼的前端顯示,所以有前端的內容
一. 準備工作
所需微信公眾號信息配置
- APPID:綁定支付的APPID(必須配置)
- MCHID:商戶號(必須配置)
- KEY:商戶支付密鑰,參考開戶郵件設置(必須配置)
- APPSECRET:公眾帳號secert(僅JSAPI支付的時候需要配置)
我這個案例用的是尚硅谷一位老師提供的,這里不方便提供出來,需要大家自己找,或者公司提供
二. 構建項目架構
1.新建maven項目

2.導入依賴
|
1
2
3
4
5
6
7
8
9
10
11
12
13
14
15
16
17
18
19
20
21
22
23
24
25
26
27
28
|
<parent> <groupId>org.springframework.boot</groupId> <artifactId>spring-boot-starter-parent</artifactId> <version>2.2.1.RELEASE</version> </parent> <dependencies> <!--spring boot --> <dependency> <groupId>org.springframework.boot</groupId> <artifactId>spring-boot-starter-web</artifactId> </dependency> <!--微信提供的sdk--> <dependency> <groupId>com.github.wxpay</groupId> <artifactId>wxpay-sdk</artifactId> <version>0.0.3</version> </dependency> <!--發送http請求--> <dependency> <groupId>org.apache.httpcomponents</groupId> <artifactId>httpclient</artifactId> </dependency> <!--模板引擎--> <dependency> <groupId>org.springframework.boot</groupId> <artifactId>spring-boot-starter-freemarker</artifactId> </dependency> </dependencies> |
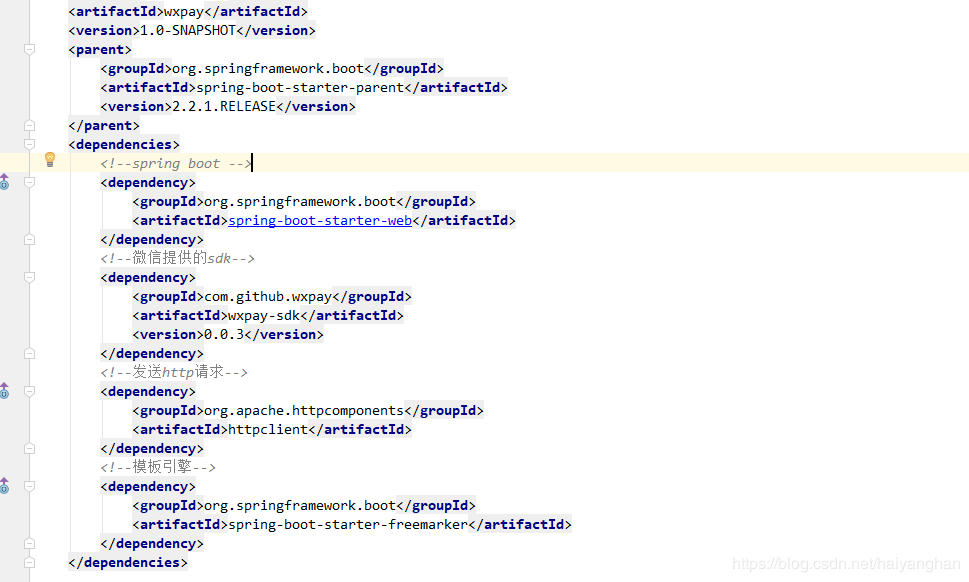
依賴中需要注意的是我導入了微信提供的sdk,以及freemarker模板引擎
3.編寫配置文件application.properties
|
1
2
3
4
5
6
7
8
9
10
11
12
13
14
15
16
17
18
19
20
21
22
|
# 服務端口server.port=8081# 微信開放平臺 appidwx.pay.app_id=#商戶號wx.pay.partner=#商戶keywx.pay.partnerkey=#回調地址wx.pay.notifyurl:spring.freemarker.tempalte-loader-path=classpath:/templates# 關閉緩存,及時刷新,上線生產環境需要修改為truespring.freemarker.cache=falsespring.freemarker.charset=UTF-8spring.freemarker.check-template-location=truespring.freemarker.content-type=text/htmlspring.freemarker.expose-request-attributes=truespring.freemarker.expose-session-attributes=truespring.freemarker.request-context-attribute=requestspring.freemarker.suffix=.ftlspring.mvc.static-path-pattern: /static/** |
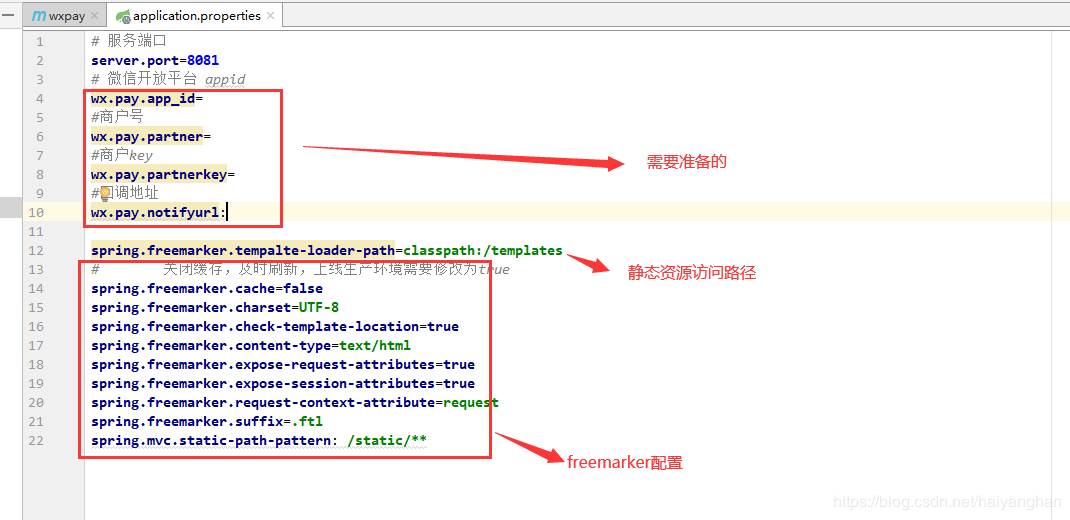
4.編寫啟動類
|
1
2
3
4
5
6
7
8
|
@SpringBootApplication@ComponentScan(basePackages = {"com.haiyang.wxpay"})public class Application { public static void main(String[] args) { SpringApplication.run(Application.class, args); }} |

5.創建常用包controller,service,impl,utils

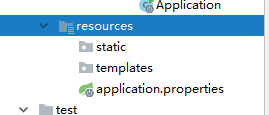
6.創建兩個前端需要的文件夾 static和templates
三. 代碼實現
1. 創建工具類讀取配置文件的參數
|
1
2
3
4
5
6
7
8
9
10
11
12
13
14
15
16
17
18
19
20
21
22
23
24
25
26
27
28
29
|
@Componentpublic class WxPayUtils implements InitializingBean { @Value("${wx.pay.app_id}") private String appId; @Value("${wx.pay.partner}") private String partner; @Value("${wx.pay.partnerkey}") private String partnerKey; @Value("${wx.pay.notifyurl}") private String notifyUrl; public static String WX_PAY_APP_ID; public static String WX_PAY_PARTNER; public static String WX_PAY_PARTNER_KEY; public static String WX_OPEN_NOTIFY_URL; @Override public void afterPropertiesSet() throws Exception { WX_PAY_APP_ID = appId; WX_PAY_PARTNER = partner; WX_PAY_PARTNER_KEY = partnerKey; WX_OPEN_NOTIFY_URL = notifyUrl; }} |

2. 構建工具類發送http請求
|
1
2
3
4
5
6
7
8
9
10
11
12
13
14
15
16
17
18
19
20
21
22
23
24
25
26
27
28
29
30
31
32
33
34
35
36
37
38
39
40
41
42
43
44
45
46
47
48
49
50
51
52
53
54
55
56
57
58
59
60
61
62
63
64
65
66
67
68
69
70
71
72
73
74
75
76
77
78
79
80
81
82
83
84
85
86
87
88
89
90
91
92
93
94
95
96
97
98
99
100
101
102
103
104
105
106
107
108
109
110
111
112
113
114
115
116
117
118
119
120
121
122
123
124
125
126
127
128
129
130
131
132
133
134
135
136
137
138
139
140
141
142
|
/** * http請求客戶端 * * @author qy * */public class HttpClient { private String url; private Map<String, String> param; private int statusCode; private String content; private String xmlParam; private boolean isHttps; public boolean isHttps() { return isHttps; } public void setHttps(boolean isHttps) { this.isHttps = isHttps; } public String getXmlParam() { return xmlParam; } public void setXmlParam(String xmlParam) { this.xmlParam = xmlParam; } public HttpClient(String url, Map<String, String> param) { this.url = url; this.param = param; } public HttpClient(String url) { this.url = url; } public void setParameter(Map<String, String> map) { param = map; } public void addParameter(String key, String value) { if (param == null) param = new HashMap<String, String>(); param.put(key, value); } public void post() throws ClientProtocolException, IOException { HttpPost http = new HttpPost(url); setEntity(http); execute(http); } public void put() throws ClientProtocolException, IOException { HttpPut http = new HttpPut(url); setEntity(http); execute(http); } public void get() throws ClientProtocolException, IOException { if (param != null) { StringBuilder url = new StringBuilder(this.url); boolean isFirst = true; for (String key : param.keySet()) { if (isFirst) url.append("?"); else url.append("&"); url.append(key).append("=").append(param.get(key)); } this.url = url.toString(); } HttpGet http = new HttpGet(url); execute(http); } /** * set http post,put param */ private void setEntity(HttpEntityEnclosingRequestBase http) { if (param != null) { List<NameValuePair> nvps = new LinkedList<NameValuePair>(); for (String key : param.keySet()) nvps.add(new BasicNameValuePair(key, param.get(key))); // 參數 http.setEntity(new UrlEncodedFormEntity(nvps, Consts.UTF_8)); // 設置參數 } if (xmlParam != null) { http.setEntity(new StringEntity(xmlParam, Consts.UTF_8)); } } private void execute(HttpUriRequest http) throws ClientProtocolException, IOException { CloseableHttpClient httpClient = null; try { if (isHttps) { SSLContext sslContext = new SSLContextBuilder() .loadTrustMaterial(null, new TrustStrategy() { // 信任所有 public boolean isTrusted(X509Certificate[] chain, String authType) throws CertificateException { return true; } }).build(); SSLConnectionSocketFactory sslsf = new SSLConnectionSocketFactory( sslContext); httpClient = HttpClients.custom().setSSLSocketFactory(sslsf) .build(); } else { httpClient = HttpClients.createDefault(); } CloseableHttpResponse response = httpClient.execute(http); try { if (response != null) { if (response.getStatusLine() != null) statusCode = response.getStatusLine().getStatusCode(); HttpEntity entity = response.getEntity(); // 響應內容 content = EntityUtils.toString(entity, Consts.UTF_8); } } finally { response.close(); } } catch (Exception e) { e.printStackTrace(); } finally { httpClient.close(); } } public int getStatusCode() { return statusCode; } public String getContent() throws ParseException, IOException { return content; }} |
額~有點長就不放圖片了 代碼都一樣
3. 新建controller
|
1
2
3
4
5
6
7
8
9
10
11
12
13
14
15
16
17
18
19
20
21
22
23
24
25
26
27
28
29
30
31
32
33
34
35
36
37
38
39
40
41
42
43
44
45
46
47
48
49
50
51
52
53
54
55
56
57
58
59
60
61
62
63
64
65
66
67
68
69
70
71
72
73
74
75
76
77
78
79
80
81
82
83
84
85
86
87
88
89
90
91
92
93
94
95
96
97
98
99
100
101
102
103
104
105
106
107
108
109
110
111
112
113
114
115
116
117
118
119
120
121
122
123
|
@Controller@RequestMapping("/wxpay")public class WxPayController { @RequestMapping("/pay") public String createPayQRcode(Model model) throws Exception{ String price = "0.01"; String no = getOrderNo(); Map m = new HashMap(); m.put("appid", WxPayUtils.WX_PAY_APP_ID); m.put("mch_id", WxPayUtils.WX_PAY_PARTNER); m.put("nonce_str", WXPayUtil.generateNonceStr()); m.put("body","微信支付測試"); //主體信息 m.put("out_trade_no", no); //訂單唯一標識 m.put("total_fee", getMoney(price));//金額 m.put("spbill_create_ip", "127.0.0.1");//項目的域名 m.put("notify_url", WxPayUtils.WX_OPEN_NOTIFY_URL);//回調地址 m.put("trade_type", "NATIVE");//生成二維碼的類型 //3 發送httpclient請求,傳遞參數xml格式,微信支付提供的固定的地址 HttpClient client = new HttpClient("https://api.mch.weixin.qq.com/pay/unifiedorder"); //設置xml格式的參數 //把xml格式的數據加密 client.setXmlParam(WXPayUtil.generateSignedXml(m, WxPayUtils.WX_PAY_PARTNER_KEY)); client.setHttps(true); //執行post請求發送 client.post(); //4 得到發送請求返回結果 //返回內容,是使用xml格式返回 String xml = client.getContent(); //把xml格式轉換map集合,把map集合返回 Map<String,String> resultMap = WXPayUtil.xmlToMap(xml); //最終返回數據 的封裝 Map map = new HashMap(); map.put("no", no); map.put("price", price); map.put("result_code", resultMap.get("result_code")); map.put("code_url", resultMap.get("code_url")); model.addAttribute("map",map); return "pay"; } @GetMapping("queryorder/{no}") @ResponseBody public String queryPayStatus(@PathVariable String no) throws Exception{ //1、封裝參數 Map m = new HashMap<>(); m.put("appid", WxPayUtils.WX_PAY_APP_ID); m.put("mch_id", WxPayUtils.WX_PAY_PARTNER); m.put("out_trade_no", no); m.put("nonce_str", WXPayUtil.generateNonceStr()); //2 發送httpclient HttpClient client = new HttpClient("https://api.mch.weixin.qq.com/pay/orderquery"); client.setXmlParam(WXPayUtil.generateSignedXml(m, WxPayUtils.WX_PAY_PARTNER_KEY)); client.setHttps(true); client.post(); //3.得到訂單數據 String xml = client.getContent(); Map<String, String> resultMap = WXPayUtil.xmlToMap(xml); //4.判斷是否支付成功 if(resultMap.get("trade_state").equals("SUCCESS")) { /* 改變數據庫中的數據等操作 */ return "支付成功"; } return "支付中"; } @GetMapping("success") public String success(){ return "success"; } @RequestMapping("test") public String test(){ return "pay"; } /** * 生成訂單號 * @return */ public static String getOrderNo() { SimpleDateFormat sdf = new SimpleDateFormat("yyyyMMddHHmmss"); String newDate = sdf.format(new Date()); String result = ""; Random random = new Random(); for (int i = 0; i < 3; i++) { result += random.nextInt(10); } return newDate + result; } /** * 元轉換成分 * @param amount * @return */ public static String getMoney(String amount) { if(amount==null){ return ""; } // 金額轉化為分為單位 // 處理包含, ¥ 或者$的金額 String currency = amount.replaceAll("\\$|\\¥|\\,", ""); int index = currency.indexOf("."); int length = currency.length(); Long amLong = 0l; if(index == -1){ amLong = Long.valueOf(currency+"00"); }else if(length - index >= 3){ amLong = Long.valueOf((currency.substring(0, index+3)).replace(".", "")); }else if(length - index == 2){ amLong = Long.valueOf((currency.substring(0, index+2)).replace(".", "")+0); }else{ amLong = Long.valueOf((currency.substring(0, index+1)).replace(".", "")+"00"); } return amLong.toString(); }} |
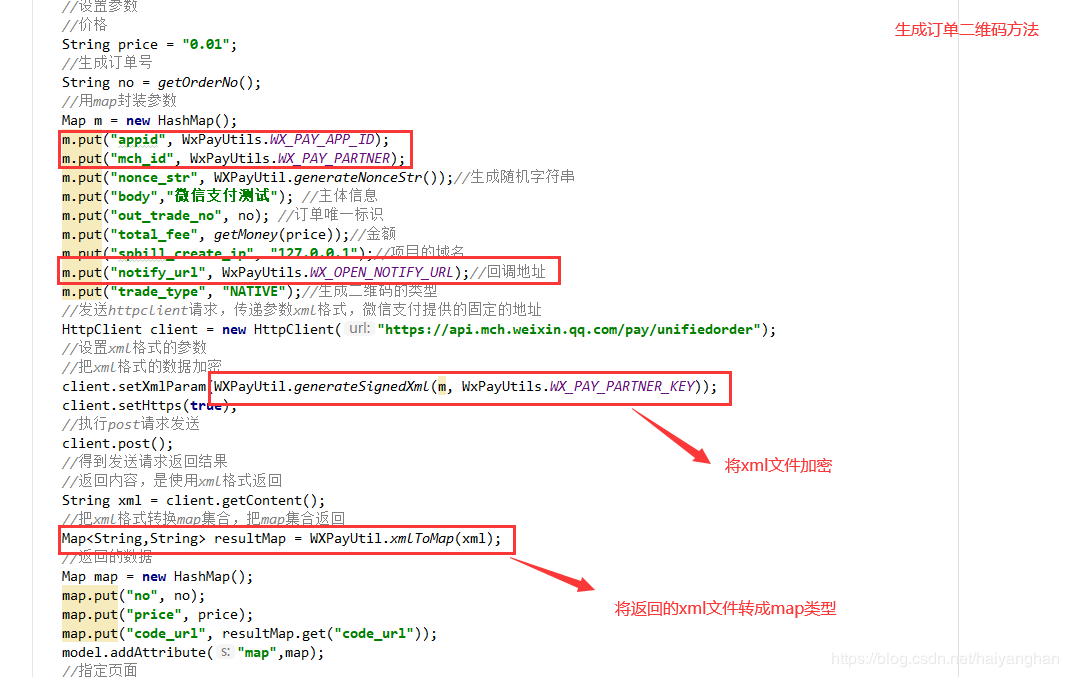


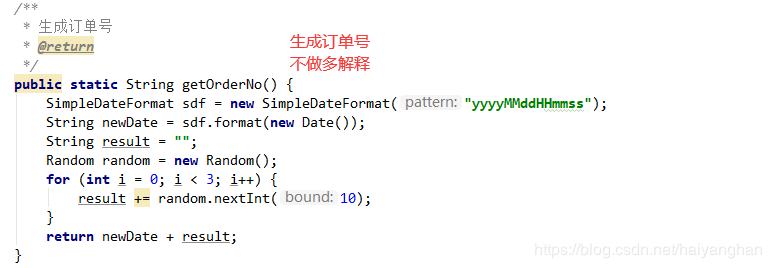

值得一提的是 這里我們用的是controller而不是restcontroller,因為我們需要展示二維碼
4. 在templates文件中新建 訂單支付頁面(二維碼生成的頁面)
注意:文件名必須和生成二維碼方法中返回的字符串名稱一樣 我這里叫 pay
先新建html頁面,然后再將后綴改成ftl(freemarker模板引擎的后綴名)
|
1
2
3
4
5
6
7
8
9
10
11
12
13
14
15
16
17
18
19
20
21
22
23
24
25
26
27
28
29
|
<!DOCTYPE html><html lang="en"><head> <meta charset="UTF-8"> <title>Title</title> <script src="/static/qrcode.js"></script> <script src="https://cdn.bootcss.com/jquery/3.4.1/jquery.js"></script></head><center> <div id="qrcode"></div></center><script type="text/javascript"> new QRCode(document.getElementById("qrcode"), "${map.code_url}"); // 設置要生成二維碼的鏈接</script><script type="text/javascript"> var int=self.setInterval("querystatus()",3000); function querystatus() { $.get("/wxpay/queryorder/${map.no}",function(data,status){ if (data==="支付中"){ console.log("支付中"); } else { clearInterval(int) window.location.href="/wxpay/success" rel="external nofollow" } }) }</script></body></html> |

再創建支付成功跳轉的頁面 文件名要與支付成功方法返回的文件名一樣
|
1
2
3
4
5
6
7
8
9
10
|
<!DOCTYPE html><html lang="en"><head> <meta charset="UTF-8"> <title>Title</title></head><body><h1>支付成功</h1></body></html> |

引入 qrcode 生成二維碼的依賴,放入static文件中
這里我提供下載鏈接
鏈接: https://pan.baidu.com/s/15-E3KpRCenAewh0ZaBLnjQ 提取碼: xhs9 復制這段內容后打開百度網盤手機App,操作更方便哦
引入完成后
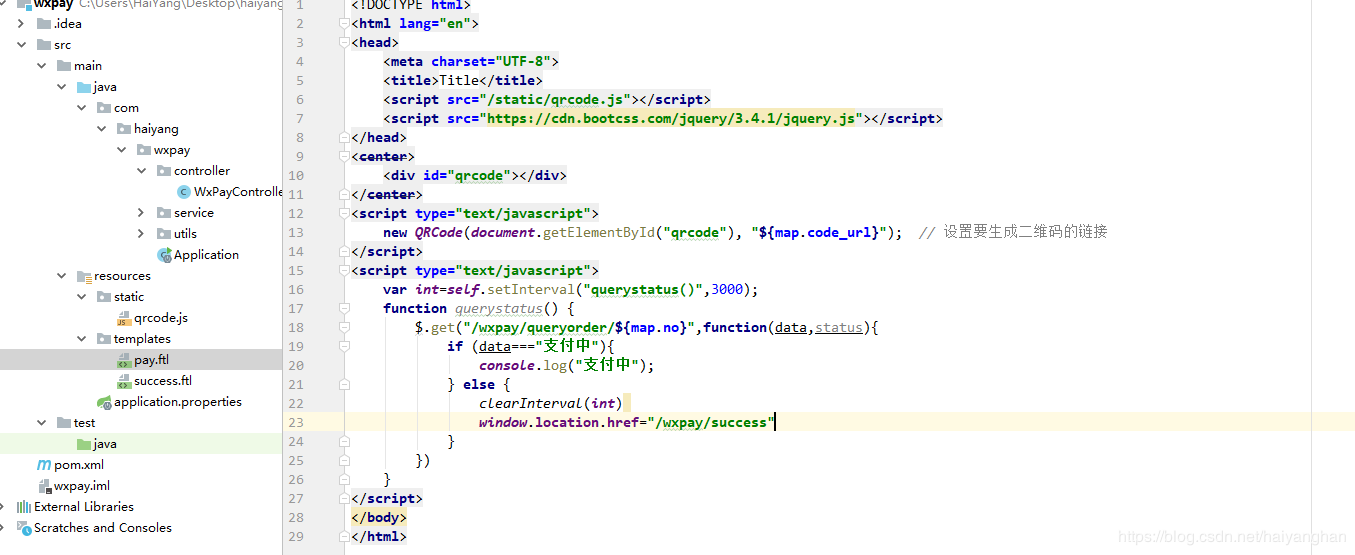
最后 我們啟動項目來測試一下
瀏覽器輸入地址
http://localhost:8081/wxpay/pay
發現二維碼生成成功,并且定時器也沒問題

之后我們掃碼支付
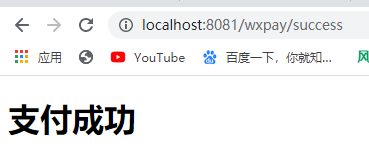
成功跳轉到支付成功頁面 ~nice
四. 總結
- 首先就是生成二維碼,需要的幾個主要的參數,訂單號,金額,購買的信息(主體信息),其余的參數除了一些可以不寫的都是固定的
- 生成二維碼然后展示在頁面上,用的qrcode插件,生成
- 然后設置定時器,來實時查詢訂單是否支付
- 查詢訂單信息的寫法和生成二維碼的方式差不多 無非就是請求時少了幾個參數,必須得帶上訂單號
- 微信提供的查詢訂單接口返回數據中 trade_state 代表支付狀態 notpay沒有支付,seccess表示已成功
- 定時器檢測到訂單支付成功就清除定時器,并且執行支付成功之后的操作
實際項目中遠沒有這么簡單,并且所有的數據都要從數據庫中獲取,在這里我為了方便把價格固定寫死的
到此這篇關于Java調用微信支付功能的方法示例代碼的文章就介紹到這了,更多相關Java調用微信支付內容請搜索服務器之家以前的文章或繼續瀏覽下面的相關文章希望大家以后多多支持服務器之家!
原文鏈接:https://blog.csdn.net/haiyanghan/article/details/106792920


