1.導入依賴
圖片展示如下,具體jar包自己下載

jar包下載完可以使用就很完美,如果導入之后報錯不能使用,則手動添加jar,進入jar所在的位置,然后執行下面命令
|
1
|
mvn install:install-file -dgroupid=com.google.code -dartifactid=kaptcha -dversion=0.0.9 -dfile=kaptcha-0.0.9.jar -dpackaging=jar -dgeneratepom=true |
然后開始寫代碼:
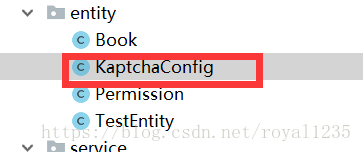
需要一個類,可以定義到entity中,看你心情吧,你開心就好,圖片如下

代碼如下:
|
1
2
3
4
5
6
7
8
9
10
11
12
13
14
|
@configurationpublic class kaptchaconfig { @bean public defaultkaptcha producer() { properties properties = new properties(); properties.put("kaptcha.border", "no"); properties.put("kaptcha.textproducer.font.color", "black"); properties.put("kaptcha.textproducer.char.space", "5"); config config = new config(properties); defaultkaptcha defaultkaptcha = new defaultkaptcha(); defaultkaptcha.setconfig(config); return defaultkaptcha; }} |
然后是controll代碼,也很簡單,直接上代碼,如下:
|
1
2
3
4
5
6
7
8
9
10
11
12
13
|
//圖片驗證碼@requestmapping("/captcha.jpg")public void captcha(httpservletresponse response)throws ioexception { response.setheader("cache-control", "no-store, no-cache"); response.setcontenttype("image/jpeg"); //生成文字驗證碼 string text = producer.createtext(); producer.createtext(); //生成圖片驗證碼 bufferedimage image = producer.createimage(text); servletoutputstream out = response.getoutputstream(); imageio.write(image, "jpg", out);} |
最后完成之后驗證碼是數字字母的組合,效果圖如下所示:

總結
以上所述是小編給大家介紹的使用google.kaptcha來生成圖片驗證碼的實現方法,希望對大家有所幫助,如果大家有任何疑問請給我留言,小編會及時回復大家的。在此也非常感謝大家對服務器之家網站的支持!
原文鏈接:https://blog.csdn.net/royal1235/article/details/82657994


