本文介紹了使用intellij idea新建一個(gè)servlet項(xiàng)目,一步步很詳細(xì),有需要的朋友可以了解一下
創(chuàng)建項(xiàng)目
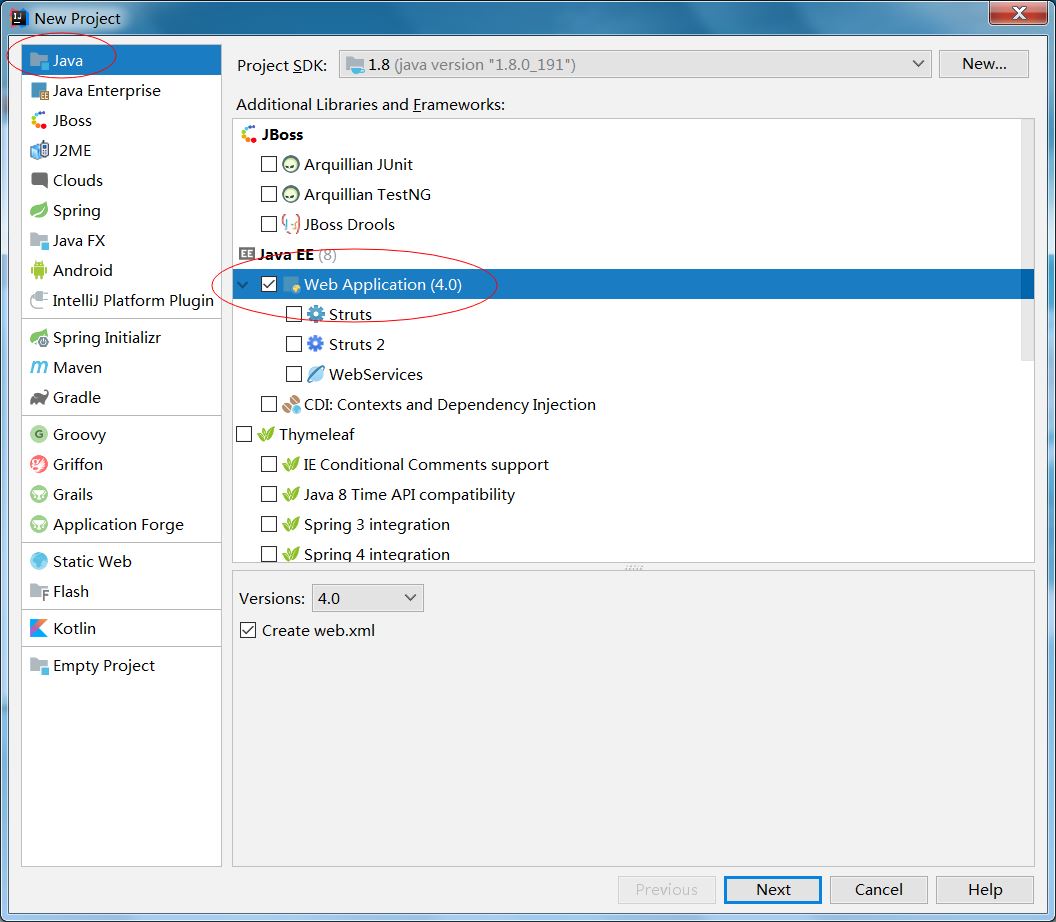
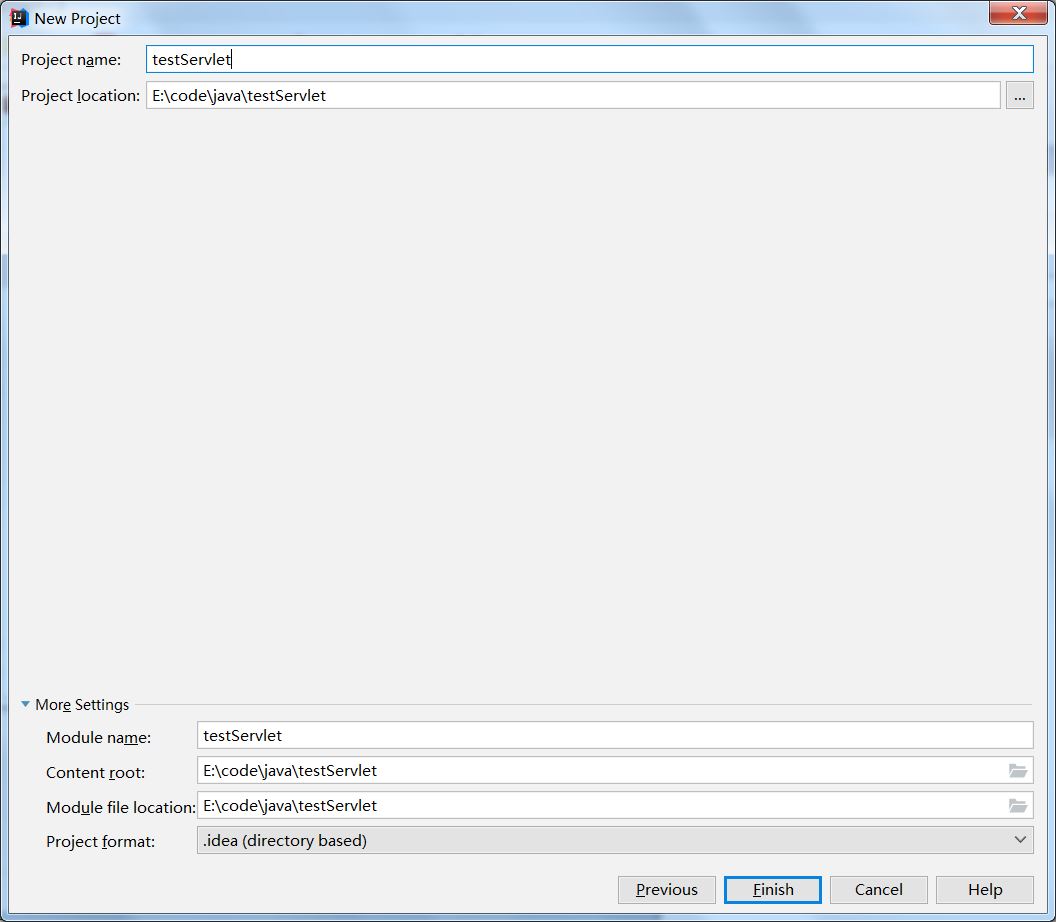
創(chuàng)建完后的目錄結(jié)構(gòu)為:
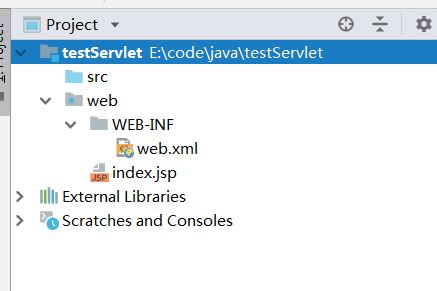
web項(xiàng)目配置
在web-inf目錄下新建兩個(gè)文件夾,分別命名未classes和lib(classes目錄用于存放編譯后的class文件,lib用于存放依賴的jar包)
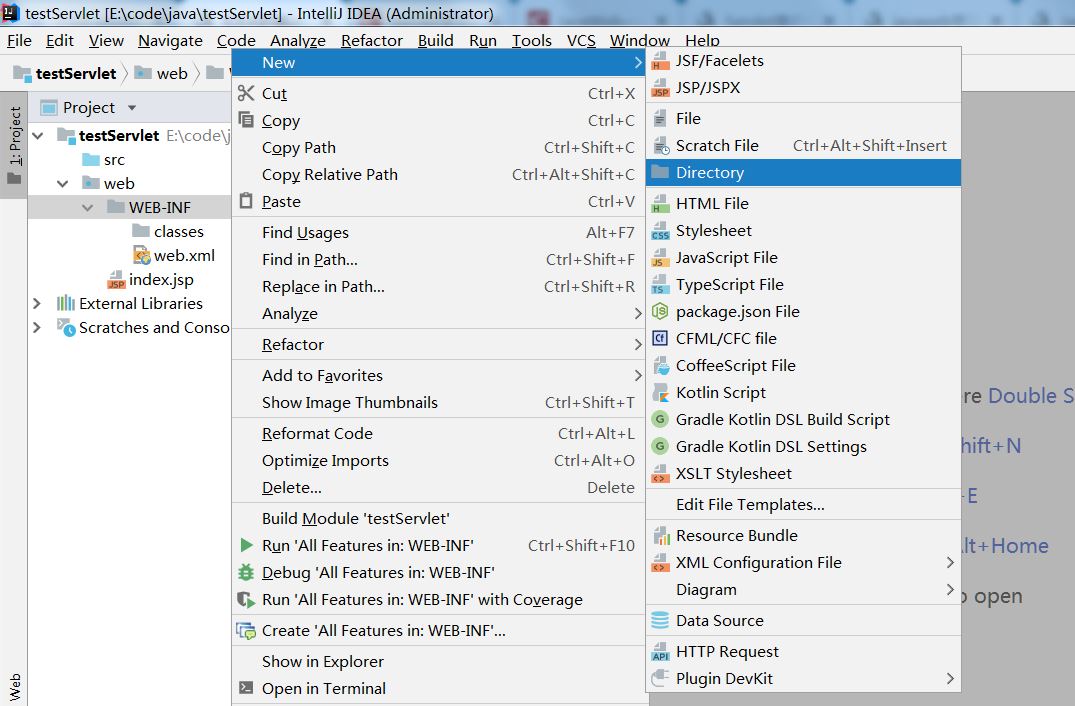
項(xiàng)目設(shè)置:file –> project structure…,進(jìn)入 project structure窗口,點(diǎn)擊 modules –> 選中項(xiàng)目“javaweb” –> 切換到 paths 選項(xiàng)卡 –> 勾選 “use module compile output path”,將 “output path” 和 “test output path” 都改為之前創(chuàng)建的classes目錄

點(diǎn)擊 modules –> 選中項(xiàng)目“javaweb” –> 切換到 dependencies 選項(xiàng)卡 –> 點(diǎn)擊右邊的“+”,選擇 “library…”,選擇tomcat的庫


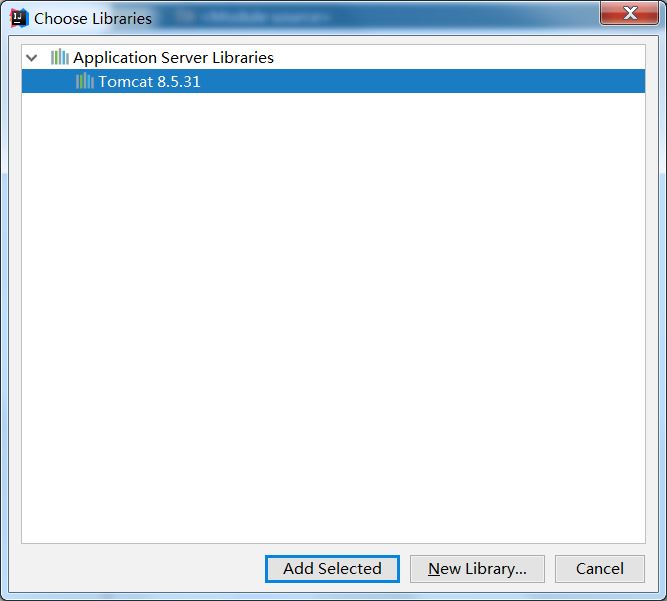

編寫servlet程序
在src目錄下創(chuàng)建servlet文件:起名為testdemo,自動(dòng)生成的接口沒有@override需要自己加上,并且在doget接口中添加內(nèi)容

|
1
2
3
4
5
6
7
8
9
10
11
12
13
14
15
|
@webservlet(name = "testdemo")public class testdemo extends httpservlet { @override protected void dopost(httpservletrequest request, httpservletresponse response) throws servletexception, ioexception { } @override protected void doget(httpservletrequest request, httpservletresponse response) throws servletexception, ioexception { response.setcontenttype("text/html"); printwriter out = response.getwriter(); out.println("<h1>hello world</h1>"); }} |
修改web.xml文件內(nèi)容:在webapp標(biāo)簽內(nèi)部加上以下內(nèi)容:
|
1
2
3
4
5
6
7
8
9
10
11
12
13
14
15
|
<?xml version="1.0" encoding="utf-8"?><web-app xmlns="http://xmlns.jcp.org/xml/ns/javaee" xmlns:xsi="http://www.w3.org/2001/xmlschema-instance" xsi:schemalocation="http://xmlns.jcp.org/xml/ns/javaee http://xmlns.jcp.org/xml/ns/javaee/web-app_4_0.xsd" version="4.0"> <servlet> <servlet-name>test</servlet-name> <servlet-class>testdemo</servlet-class> </servlet> <servlet-mapping> <servlet-name>test</servlet-name> <url-pattern>/</url-pattern> </servlet-mapping></web-app> |
運(yùn)行程序
配置tomcat容器:
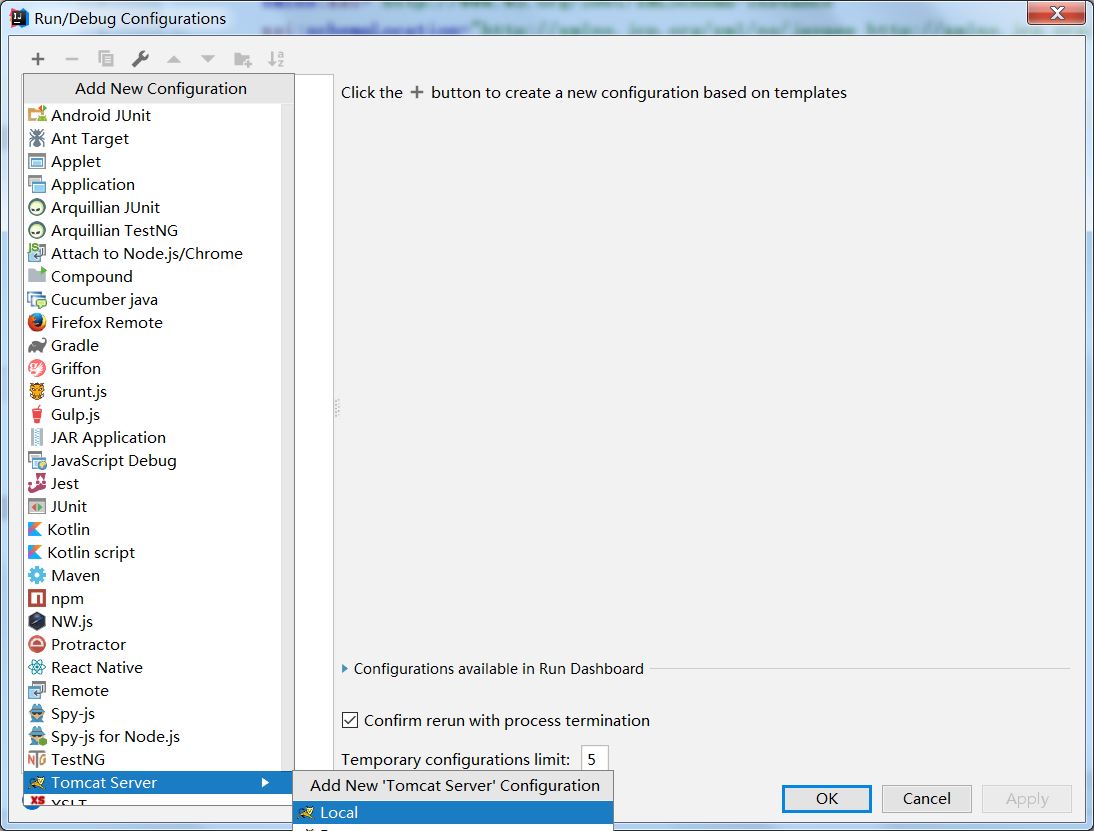

配置好后運(yùn)行程序,然后訪問:http://localhost:8080/test
得到結(jié)果

以上就是本文的全部內(nèi)容,希望對大家的學(xué)習(xí)有所幫助,也希望大家多多支持服務(wù)器之家。
原文鏈接:http://www.cnblogs.com/grasp/p/10023875.html


