前幾天準備寫一個小程序,一直認為fragment實現底部導航欄,是很容易的事情,可是卻遇到了前所未有的問題,先給大家貼出來我出錯的界面布局代碼:
|
1
2
3
4
5
6
7
8
9
10
11
12
13
14
15
16
17
18
19
20
21
22
23
24
25
26
27
28
29
30
31
32
33
34
35
36
37
38
39
40
41
42
43
44
45
46
47
48
49
50
51
52
53
54
55
56
57
58
59
60
61
62
63
64
65
66
67
|
<RelativeLayout xmlns:android="http://schemas.android.com/apk/res/android" xmlns:tools="http://schemas.android.com/tools" android:layout_width="fill_parent" android:layout_height="fill_parent" android:background="@color/theme_color" android:clipToPadding="true" android:fitsSystemWindows="true" > <include android:id="@+id/actionbar_activity_main" layout="@layout/actionbar" /> <RelativeLayout android:layout_width="fill_parent" android:layout_height="fill_parent" android:layout_below="@id/actionbar_activity_main" android:background="@color/white" > <RadioGroup android:id="@+id/rg_menu_activity_main" android:layout_width="fill_parent" android:layout_height="55dp" android:layout_alignParentBottom="true" android:background="@color/theme_color" android:gravity="center" android:orientation="horizontal" android:weightSum="3" > <RadioButton android:id="@+id/rb_main_tab_menu1" style="@style/rbt_bottom" android:checked="true" android:drawableTop="@drawable/radiobt_main_home" android:gravity="center" android:paddingTop="12dp" android:text="@string/home_text" android:textColor="@color/white" /> <RadioButton android:id="@+id/rb_main_tab_menu2" style="@style/rbt_bottom" android:checked="false" android:drawableTop="@drawable/radiobt_main_my" android:gravity="center" android:paddingTop="12dp" android:text="@string/my_text" android:textColor="@color/white" /> <RadioButton android:id="@+id/rb_main_tab_menu3" style="@style/rbt_bottom" android:checked="false" android:drawableTop="@drawable/radiobt_main_setting" android:gravity="center" android:paddingTop="12dp" android:text="@string/setting_text" android:textColor="@color/white" /> </RadioGroup> <android.support.v4.view.ViewPager android:id="@+id/vp_activity_main" android:layout_width="fill_parent" android:layout_height="fill_parent" android:layout_above="@id/rg_menu_activity_main" /> </RelativeLayout> </RelativeLayout> |
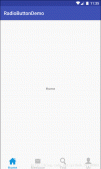
這個布局實現的效果如下:

只看效果,大家覺得挺好的,但是重要的問題來了。
下面的radioButton點了沒反應,我檢查了一下xml文件,再檢查了一下java代碼,沒有問題啊,我開始方了,,,然后網上搜,好像沒有人遇到這個問題,,檢查好幾遍之后,問旁邊的同學,他說 既然設置了監聽,但是沒有反應,那肯定是有一個東西把這個事件消費掉了,我想起來了之前看的事件分發機制,,建議大家對事件分發機制不懂的小伙伴趕緊看看,面試和日常寫代碼都要用到,特別是面試,面試官特別喜歡問。
回歸正題,大家看我的 xml文件,我把viewpager寫在了Radiogroup的下面,并且,layout_height = "fill_parent" 這樣我的viewpager就消費掉了我的radiobutton的點擊事件,其實之后我覺得,是我的邏輯不正確,我應該順序的寫下來,而不是只實現功能,這樣我看自己的代碼可以看懂,可是給別人可能會造成誤解。
好了,開始說一下,實現底部導航的整個流程,實現的界面還如上:(在studio中寫的)
actionbar.xml 上面自定義的 actionbar 系統自帶的actionbar在java代碼中去掉了
代碼功能: 左邊返回鍵 中間顯示的文字 右邊的 更多 鍵 上圖中沒有顯示出來,是因為我沒有讓 左右的鍵顯示出來
|
1
2
3
4
5
6
7
8
9
10
11
12
13
14
15
16
17
18
19
20
21
22
23
24
25
26
27
28
29
30
31
32
33
34
35
36
37
38
39
40
41
42
43
44
45
|
<?xml version="1.0" encoding="utf-8"?> <RelativeLayout xmlns:android="http://schemas.android.com/apk/res/android" android:layout_width="fill_parent" android:layout_height="@dimen/actionBar_height" android:background="@color/theme_color" > <RelativeLayout android:id="@+id/rl_back_actionbar" android:layout_width="@dimen/actionBar_back" android:layout_height="fill_parent" android:visibility="invisible"> <ImageView android:layout_width="22dp" android:layout_height="20dp" android:layout_centerVertical="true" android:layout_marginLeft="12dp" android:background="@drawable/back" android:contentDescription="@string/app_name"/> </RelativeLayout> <TextView android:id="@+id/tv_title_actionbar" android:layout_width="wrap_content" android:layout_height="wrap_content" android:layout_centerInParent="true" android:text="@string/TimeRobot" android:textColor="#ffffff" android:textSize="@dimen/actionBar_title_text_size" /> <RelativeLayout android:id="@+id/rl_more_actionbar" android:layout_width="wrap_content" android:layout_height="fill_parent" android:layout_alignParentRight="true" android:visibility="invisible"> <ImageView android:layout_width="25dp" android:layout_height="25dp" android:layout_centerVertical="true" android:layout_marginRight="12dp" android:background="@drawable/more" android:contentDescription="@string/app_name"/> </RelativeLayout> </RelativeLayout> |
activity_main.xml 文件
中間的部分color資源,是我引用的自動的,大家可以自己選擇
|
1
2
3
4
5
6
7
8
9
10
11
12
13
14
15
16
17
18
19
20
21
22
23
24
25
26
27
28
29
30
31
32
33
34
35
36
37
38
39
40
41
42
43
44
45
46
47
48
49
50
51
52
53
54
55
56
57
58
59
60
61
62
63
64
65
66
67
68
|
<?xml version="1.0" encoding="utf-8"?> <RelativeLayout xmlns:android="http://schemas.android.com/apk/res/android" xmlns:tools="http://schemas.android.com/tools" android:layout_width="match_parent" android:layout_height="match_parent" android:background="@color/theme_color" android:clipToPadding="true" tools:context=".MainActivity"> <!-- 引入 actionbar--> <include android:id="@+id/actionbar_activity_main" layout= "@layout/actionbar"/> <android.support.v4.view.ViewPager android:id="@+id/vp_activity_main" android:layout_width="fill_parent" android:layout_height="fill_parent" android:layout_below="@+id/actionbar_activity_main" android:layout_alignParentRight="true" android:layout_alignParentEnd="true" android:background="@color/white"/> <RadioGroup android:id="@+id/rg_main_radioGroup" android:layout_width="fill_parent" android:layout_height="58dp" android:layout_alignParentBottom="true" android:background="@color/theme_color" android:gravity="center" android:orientation="horizontal" android:weightSum="3"> <RadioButton android:id="@+id/rb_main_tab_menu1" android:layout_weight="1" android:layout_width="0dp" android:layout_height="fill_parent" android:checked="true" android:drawableTop="@drawable/radio_bt_plan" android:gravity="center" android:button="@null" android:paddingTop="8dp" android:text="@string/home_text" android:textColor="@color/white"/> <RadioButton android:id="@+id/rb_main_tab_menu2" android:layout_weight="1" android:layout_width="0dp" android:layout_height="fill_parent" android:checked="false" android:drawableTop="@drawable/radio_bt_time" android:gravity="center" android:button="@null" android:paddingTop="8dp" android:text="@string/timeGroup" android:textColor="@color/white"/> <RadioButton android:id="@+id/rb_main_tab_menu3" android:layout_weight="1" android:layout_width="0dp" android:layout_height="fill_parent" android:checked="false" android:drawableTop="@drawable/radio_bt_my" android:gravity="center" android:button="@null" android:paddingTop="8dp" android:textColor="@color/white" android:text="@string/My"/> </RadioGroup> </RelativeLayout> |
注意一下,radiobutton中的一個屬性是 drawableTop屬性, 這個后面引用的drawable資源是 實現 點擊改變radiobutton狀態的布局文件,我給大家貼出來 radio_bt_plan.xml文件的代碼,其他的只要新建,copy代碼,改顯示的圖片即可。
還有,對于初次用studio的伙伴,這里要注意了,new的時候,drawable --->右鍵 ----> new ----> new resource file (即 出來的第一個) 而不是XML
radio_bt_plan.xml
|
1
2
3
4
5
6
7
8
9
10
11
12
13
14
15
16
17
|
<?xml version="1.0" encoding="utf-8"?> <selector xmlns:android="http://schemas.android.com/apk/res/android"> <item android:drawable="@drawable/planning_press" android:state_enabled="true" android:state_focused="true" android:state_pressed="false"/> <item android:drawable="@drawable/planning_press" android:state_enabled="true" android:state_pressed="true" /> <item android:drawable="@drawable/planning_press" android:state_checked="true" android:state_enabled="true" /> <item android:drawable="@drawable/planning"/> </selector> |
接下來就是 MainActivity.java文件了
|
1
2
3
4
5
6
7
8
9
10
11
12
13
14
15
16
17
18
19
20
21
22
23
24
25
26
27
28
29
30
31
32
33
34
35
36
37
38
39
40
41
42
43
44
45
46
47
48
49
50
51
52
53
54
55
56
57
58
59
60
61
62
63
64
65
66
67
68
69
70
71
72
73
74
75
76
77
78
79
80
81
82
83
84
85
86
87
88
89
90
91
92
93
94
95
96
97
98
99
100
101
102
103
104
105
106
107
108
109
110
111
112
113
114
115
116
117
118
119
120
121
122
123
124
125
126
|
public class MainActivity extends FragmentActivity { private TextView title_text; private ViewPager vp_main_tab; private List<Fragment> fragmentList = null; private FragmentPagerAdapter mAdapter = null; private MyFragment myFragment; private TimeGroupFragment timeGroupFragment; private PlanningFragment planningFragment; private RadioButton rb_main_tab_menu1; private RadioButton rb_main_tab_menu2; private RadioButton rb_main_tab_menu3; private RadioGroup rg_main_group; @Override protected void onCreate(Bundle savedInstanceState) { super.onCreate(savedInstanceState); requestWindowFeature(Window.FEATURE_NO_TITLE); setContentView(R.layout.activity_main); init(); rg_main_group.setOnCheckedChangeListener(new RadioGroup.OnCheckedChangeListener() { @Override public void onCheckedChanged(RadioGroup group, int checkedId) { switch (checkedId) { case R.id.rb_main_tab_menu1: vp_main_tab.setCurrentItem(0); initActionbar(0); break; case R.id.rb_main_tab_menu2: vp_main_tab.setCurrentItem(1); initActionbar(1); break; case R.id.rb_main_tab_menu3: vp_main_tab.setCurrentItem(2); initActionbar(2); break; default: break; } } }); initViewPage(); } private void initActionbar(int currentPage) { switch (currentPage) { case 0: title_text.setText(getResources().getString(R.string.TimeRobot)); break; case 1: title_text.setText(getResources().getString(R.string.timeGroup)); break; case 2: title_text.setText(getResources().getString(R.string.My)); break; default: break; } } private void init() { title_text = (TextView) findViewById(R.id.tv_title_actionbar); vp_main_tab = (ViewPager) findViewById(R.id.vp_activity_main); fragmentList = new ArrayList<Fragment>(); rg_main_group = (RadioGroup) findViewById(R.id.rg_main_radioGroup); rb_main_tab_menu1 = (RadioButton) findViewById(R.id.rb_main_tab_menu1); rb_main_tab_menu2 = (RadioButton) findViewById(R.id.rb_main_tab_menu2); rb_main_tab_menu3 = (RadioButton) findViewById(R.id.rb_main_tab_menu3); myFragment = new MyFragment(); timeGroupFragment = new TimeGroupFragment(); planningFragment = new PlanningFragment(); fragmentList.add(myFragment); fragmentList.add(timeGroupFragment); fragmentList.add(planningFragment); } private void initViewPage() { android.support.v4.app.FragmentManager fm = getSupportFragmentManager(); mAdapter = new FragmentPagerAdapter(fm) { @Override public int getCount() { return fragmentList == null ? 0 : fragmentList.size(); } @Override public android.support.v4.app.Fragment getItem(int position) { return fragmentList.get(position); } }; vp_main_tab.setAdapter(mAdapter); vp_main_tab.setOnPageChangeListener(new ViewPager.OnPageChangeListener() { @Override public void onPageSelected(int position) { initActionbar(position); switch (position) { case 0: rb_main_tab_menu1.setChecked(true); break; case 1: rb_main_tab_menu2.setChecked(true); break; case 2: rb_main_tab_menu3.setChecked(true); break; default: break; } } @Override public void onPageScrolled(int arg0, float arg1, int arg2) { } @Override public void onPageScrollStateChanged(int state) { } }); } } |
這就是整個是實現經過,如有什么不足的地方,還請多多指教;
以上就是本文的全部內容,希望對大家的學習有所幫助,也希望大家多多支持服務器之家。
原文鏈接:https://blog.csdn.net/crazy_yyyyy/article/details/51407897


