1. MyBatisPlus 介紹
MyBatis-Plus(簡稱 MP),是一個 MyBatis 的增強工具包,只做增強不做改變. 為簡化開發工作、提高生產率而生。
啟動加載 XML 配置時注入單表 SQL 操作 ,為簡化開發工作提供生產率而生。mybatis-plus 只做增強不做改變,這里不提倡 SQL 寫在代碼中。
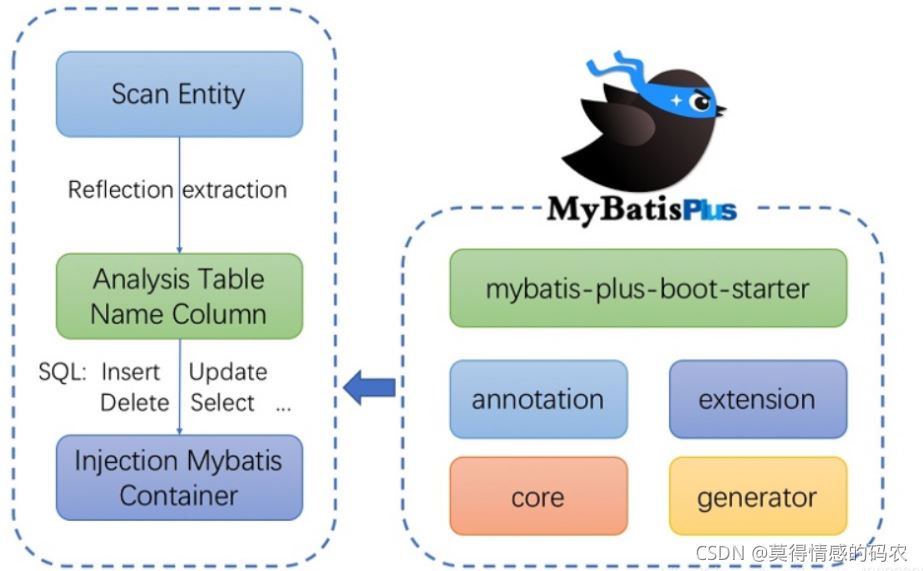
我們來看看mybatis和mybatisPlus的區別 首先,看看圖標

很明顯,圖標中小鳥只是眼罩發生了變化。接下來,我們看看功能方面的變化

在這里我們可以很明顯的看到,mybatisPlus是在mybatis上進行了增強。
官網:https://mp.baomidou.com/
功能:
1、單表CURD (簡單+批量)操作,自動完成。
2、分頁插件,Count 查詢自動或自定義SQL 查詢。
3、Spring 根據不同環境加載不同配置支持。
使用:添加maven坐標,查看相關類,進行調用
<dependency>
<groupId>com.baomidou</groupId>
<artifactId>mybatis-plus</artifactId>
<version>maven 官方最新版本號為準</version>
</dependency>
1、代碼自動生成,查看類com.baomidou.mybatisplus.test.AutoGeneratorTest
2、使用方法,查看類com.baomidou.mybatisplus.test.UserMapperTest
2 .案例
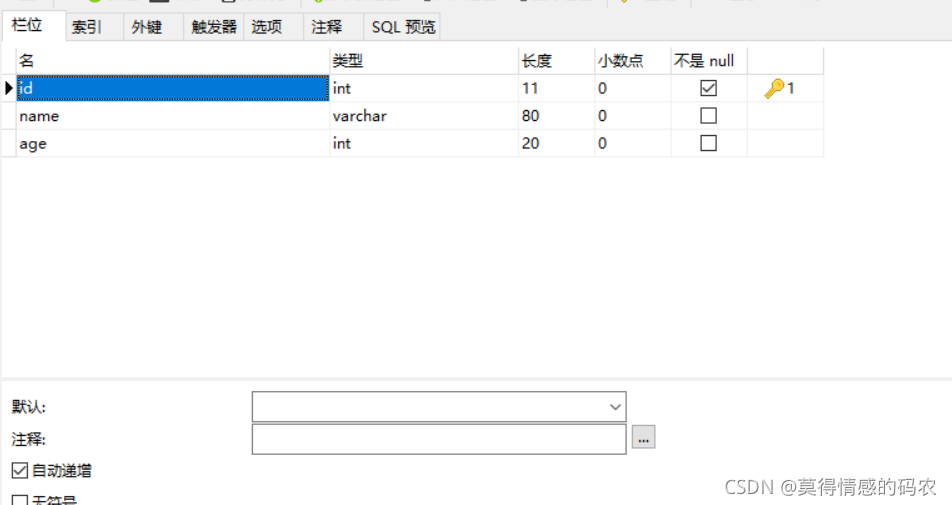
我們先來創建表

創建一個springboot工程 ,pom文件
<dependencies>
      <dependency>
          <groupId>org.springframework.boot</groupId>
          <artifactId>spring-boot-starter-web</artifactId>
      </dependency>
      <dependency>
          <groupId>org.springframework.boot</groupId>
          <artifactId>spring-boot-starter</artifactId>
      </dependency>
      <dependency>
          <groupId>org.springframework.boot</groupId>
          <artifactId>spring-boot-starter-test</artifactId>
          <scope>test</scope>
      </dependency>
      <dependency>
          <groupId>mysql</groupId>
          <artifactId>mysql-connector-java</artifactId>
          <version>5.1.6</version>
          <scope>runtime</scope>
      </dependency>
<!--        mybatis-plus-->
      <dependency>
          <groupId>com.baomidou</groupId>
          <artifactId>mybatis-plus-boot-starter</artifactId>
          <version>3.4.3</version>
      </dependency>
      <dependency>
          <groupId>junit</groupId>
          <artifactId>junit</artifactId>
          <scope>test</scope>
      </dependency>
  </dependencies>
核心配置文件
spring:
datasource:
  driver-class-name: com.mysql.jdbc.Driver
  url: jdbc:mysql://localhost:3306/test?useUnicode=true&characterEncoding=UTF-8&useJDBCCompliantTimezoneShift=true&useLegacyDatetimeCode=false&serverTimezone=GMT%2B8
  username: root
  password: 123456
mybatis-plus:
configuration:
  log-impl: org.apache.ibatis.logging.stdout.StdOutImpl  #日志信息
寫實體類
package com.liuhaiyang.entity;
import com.baomidou.mybatisplus.annotation.IdType;
import com.baomidou.mybatisplus.annotation.TableField;
import com.baomidou.mybatisplus.annotation.TableId;
import com.baomidou.mybatisplus.annotation.TableName;
@TableName(value = "t_student")  //指定表的名稱
public class Address {
  /*
   *指定主鍵的方式:使用@TableId注解
   * value:指定主鍵字段的名稱,如果主鍵字段的名稱是id,value屬性可以省略
   * type:指定主鍵字段的類型,IdType.AUTO表示自動增長
   */
  @TableId(value = "id",type = IdType.AUTO)
  private Integer id;
  //當屬性名和字段名不一致時,指定屬性和列名的對應關系(@TableField)value指列名
  @TableField(value = "name")
  private String name;
  @TableField(value = "age")
  private Integer age;
  public Address() {
  }
  public Address(String name, Integer age) {
      this.name = name;
      this.age = age;
  }
  public Integer getId() {
      return id;
  }
  public void setId(Integer id) {
      this.id = id;
  }
  public String getName() {
      return name;
  }
  public void setName(String name) {
      this.name = name;
  }
  public Integer getAge() {
      return age;
  }
  public void setAge(Integer age) {
      this.age = age;
  }
  @Override
  public String toString() {
      return "Address{" +
              "id=" + id +
              ", name='" + name + '\'' +
              ", age=" + age +
              '}';
  }
}
編寫mapper接口,讓它繼承MP框架中的BaseMapper接口。
package com.liuhaiyang.mapper;
import com.baomidou.mybatisplus.core.mapper.BaseMapper;
import com.liuhaiyang.entity.Address;
public interface AddressMapper extends BaseMapper<Address> {
}
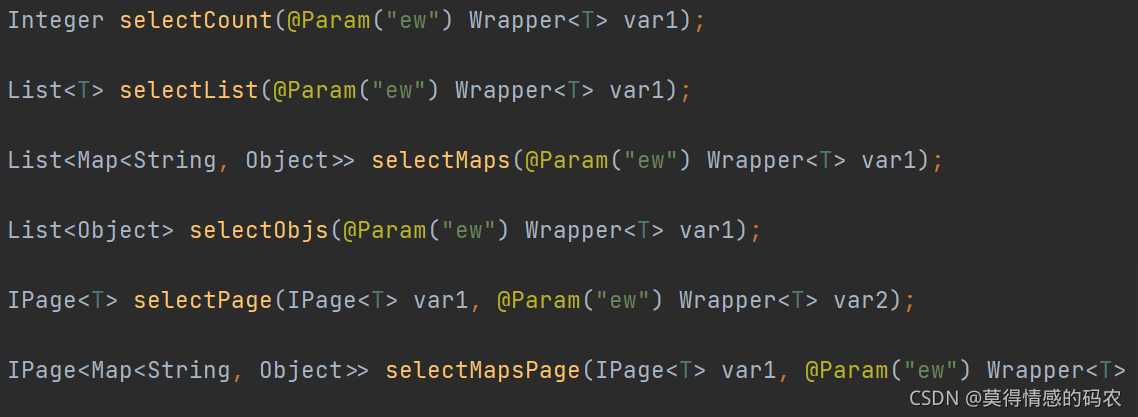
mybatisPlus框架中的BaseMapper接口中定義了17個關于CRUD的操作方法。


能夠滿足我們對表的操作,如果我們需要的操作都在這里,可以不寫mapper.xml配置文件
在SpringBoot項目的啟動入口類上添加 @MapperScan 注解,確保掃描mapper包下所有mybatis、mybatis-plus相關的注解。
@SpringBootApplication
@MapperScan(value = "com.liuhaiyang.mapper")  //掃描器
public class MybatisPlusApplication {
  public static void main(String[] args) {
      SpringApplication.run(MybatisPlusApplication.class, args);
  }
}
我們在來測試一下,寫一個測試類測試一下啊
insert操作
@SpringBootApplication
@MapperScan(value = "com.liuhaiyang.mapper")  //掃描器
public class MybatisPlusApplication {
  public static void main(String[] args) {
      SpringApplication.run(MybatisPlusApplication.class, args);
  }
}

update操作
@Test
  public void updateaddress() {
      Address address=new Address();
      address.setId(10);
      address.setName("趙六");
      //判斷字段是否會進行更新,依據字段是否為null,
      //如果非null,則加入set語句中;為null,則不加入set語句
      int rows=addressMapper.updateById(address);
      System.out.println("update的結果是:" + rows);
  }

select操作
@Test
  public void selectaddress() {
      Address rows=addressMapper.selectById(10);
      System.out.println("select的結果是:" + rows);
  }

delete操作
@Test
  public void deleteaddress() {
      int rows=addressMapper.deleteById(10);
      System.out.println("delete的結果是:" + rows);
  }

總結
本篇文章就到這里了,希望能夠給你帶來幫助,也希望您能夠多多關注服務器之家的更多內容!
原文鏈接:https://blog.csdn.net/liuhaiyang98/article/details/120941464


