本文實例為大家分享了unity鍵盤wasd實現(xiàn)物體移動的具體代碼,供大家參考,具體內(nèi)容如下
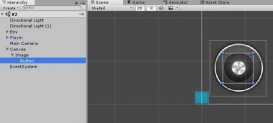
1首先在場景中建立一個capsule,將主攝像機拖到其物體下。

2.將腳本掛在capsule物體下,wasd 控制移動方向,空格延y軸向上移動,f延y軸向下移動
|
1
2
3
4
5
6
7
8
9
10
11
12
13
14
15
16
17
18
19
20
21
22
23
24
25
26
27
28
29
30
31
32
33
34
35
36
37
38
39
40
41
42
43
44
45
46
47
48
49
50
51
52
53
54
55
56
57
58
59
60
61
62
63
64
65
66
67
68
69
70
71
72
73
|
using system.collections;using system.collections.generic;using unityengine; public class movecam : monobehaviour{ private vector3 m_camrot; private transform m_camtransform;//攝像機transform private transform m_transform;//攝像機父物體transform public float m_movspeed=10;//移動系數(shù) public float m_rotatespeed=1;//旋轉(zhuǎn)系數(shù) private void start() { m_camtransform = camera.main.transform; m_transform = getcomponent<transform>(); } private void update() { control(); } void control() { if (input.getmousebutton(0)) { //獲取鼠標移動距離 float rh = input.getaxis("mouse x"); float rv = input.getaxis("mouse y"); // 旋轉(zhuǎn)攝像機 m_camrot.x -= rv * m_rotatespeed; m_camrot.y += rh*m_rotatespeed; } m_camtransform.eulerangles = m_camrot; // 使主角的面向方向與攝像機一致 vector3 camrot = m_camtransform.eulerangles; camrot.x = 0; camrot.z = 0; m_transform.eulerangles = camrot; // 定義3個值控制移動 float xm = 0, ym = 0, zm = 0; //按鍵盤w向上移動 if (input.getkey(keycode.w)) { zm += m_movspeed * time.deltatime; } else if (input.getkey(keycode.s))//按鍵盤s向下移動 { zm -= m_movspeed * time.deltatime; } if (input.getkey(keycode.a))//按鍵盤a向左移動 { xm -= m_movspeed * time.deltatime; } else if (input.getkey(keycode.d))//按鍵盤d向右移動 { xm += m_movspeed * time.deltatime; } if (input.getkey(keycode.space) && m_transform.position.y <= 3) { ym+=m_movspeed * time.deltatime; } if (input.getkey(keycode.f) && m_transform.position.y >= 1) { ym -= m_movspeed * time.deltatime; } m_transform.translate(new vector3(xm,ym,zm),space.self); }} |
以上就是本文的全部內(nèi)容,希望對大家的學習有所幫助,也希望大家多多支持服務器之家。
原文鏈接:https://blog.csdn.net/weixin_38527697/article/details/79675188


