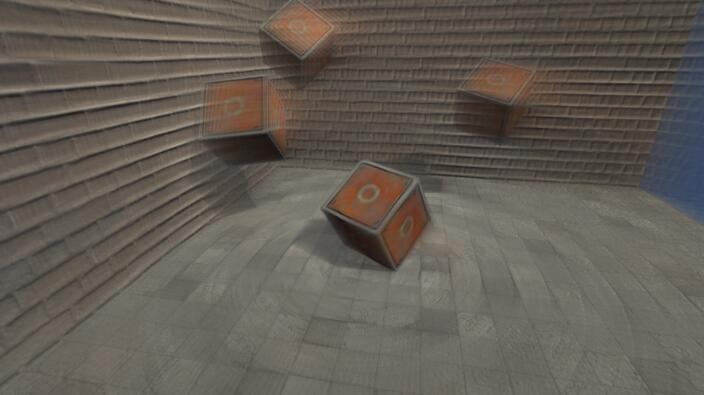
本文實例為大家分享了unityshader實現運動模糊的具體代碼,供大家參考,具體內容如下
1.此代碼掛在攝像機上,使攝像機運動起來
|
1
2
3
4
5
6
7
8
9
10
11
12
13
14
15
16
17
18
19
20
21
22
23
24
25
26
27
28
29
30
|
using unityengine;using system.collections; public class translating : monobehaviour { public float speed = 10.0f; public vector3 startpoint = vector3.zero; public vector3 endpoint = vector3.zero; public vector3 lookat = vector3.zero; public bool pingpong = true; private vector3 curendpoint = vector3.zero; // use this for initialization void start () { transform.position = startpoint; curendpoint = endpoint; } // update is called once per frame void update () { transform.position = vector3.slerp(transform.position, curendpoint, time.deltatime * speed); transform.lookat(lookat); if (pingpong) { if (vector3.distance(transform.position, curendpoint) < 0.001f) { curendpoint = vector3.distance(curendpoint, endpoint) < vector3.distance(curendpoint, startpoint) ? startpoint : endpoint; } } }} |
2.此代碼掛在攝像機上
|
1
2
3
4
5
6
7
8
9
10
11
12
13
14
15
16
17
18
19
20
21
22
23
24
25
26
27
28
29
30
31
32
33
34
35
36
37
38
39
40
41
42
43
44
45
46
47
48
49
50
51
52
53
54
55
56
57
58
59
60
61
62
63
64
65
66
67
|
using system.collections;using system.collections.generic;using unityengine; public class motionblur : posteffectsbase{ public shader motionblurshader; private material _motionblurmaterial = null; public material material { get { _motionblurmaterial = checkshaderandcreatematerial(motionblurshader, _motionblurmaterial); return _motionblurmaterial; } } //定義運動模糊在混合圖像時使用的模糊參數,值越大,拖尾越明顯,但過大會完全替代當前幀的渲染結果,所以最大為0.9 [range(0.0f, 0.9f)] public float bluramount = 0.5f; //定義一個rendertexture類型的變量,保存之前圖像疊加的結果 private rendertexture _accumulationtexture; //當腳本不運行時,立即銷毀,這樣在下一次開始運行時會重新疊加圖像 void ondisable() { destroyimmediate(_accumulationtexture); } void onrenderimage(rendertexture src, rendertexture dest) { if (material != null) { //判斷用于混合圖像的_accumulationtexture是否為空,或者是否與當前屏幕分辨率相等 //如果不滿足,需要重新創建 if (_accumulationtexture == null || _accumulationtexture.width != src.width || _accumulationtexture.height != src.height) { //立即銷毀當前_accumulationtexture destroyimmediate(_accumulationtexture); //創建一個與當前屏幕分辨率相等的 _accumulationtexture = new rendertexture(src.width, src.height, 0); //由于我們自己控制這個變量的銷毀,所以不需要他顯示在hierarchy中,也不需要保存在場景中 _accumulationtexture.hideflags = hideflags.hideanddontsave; //使用當前的幀圖像初始化_accumulationtexture graphics.blit(src, _accumulationtexture); } //對渲染紋理進行恢復操作,發生在渲染的紋理而該紋理又沒有被提前清空或銷毀的情況下 //運動模糊每次調用onrenderimage函數,都需要把當前紋理與_accumulationtexture中的圖像混合,所以_accumulationtexture不需要被提前清空 _accumulationtexture.markrestoreexpected(); //將參數傳給材質 material.setfloat("_bluramount", 1.0f - bluramount); //把當前的屏幕圖像疊加到_accumulationtexture graphics.blit(src, _accumulationtexture, material); //把疊加后的圖像輸出到屏幕 graphics.blit(_accumulationtexture, dest); } else { graphics.blit(src, dest); } }} |
3.此shader賦值給代碼2
|
1
2
3
4
5
6
7
8
9
10
11
12
13
14
15
16
17
18
19
20
21
22
23
24
25
26
27
28
29
30
31
32
33
34
35
36
37
38
39
40
41
42
43
44
45
46
47
48
49
50
51
52
53
54
55
56
57
58
59
60
61
62
63
64
65
66
67
68
|
shader "unity shaders book/chapter 12/motionblur"{ properties { _maintex ("base (rgb)", 2d) = "white" {} //混合系數 _bluramount("blur amount", float) = 1.0 } subshader { cginclude #include "unitycg.cginc" sampler2d _maintex; fixed _bluramount; //定義頂點著色器 struct v2f { float4 pos : sv_position; half2 uv : texcoord0; }; v2f vert(appdata_img v) { v2f o; o.pos = unityobjecttoclippos(v.vertex); o.uv = v.texcoord; return o; } //定義第一個片元著色器,用于更新渲染紋理的rgb通道部分 fixed4 fragrgb(v2f i) : sv_target{ //將a通道的值設為_bluramount,這樣在后面混合時可直接使用透明通道進行混合 return fixed4(tex2d(_maintex, i.uv).rgb, _bluramount); } //定義第二個片元著色器,用于更新渲染紋理的a通道部分 half4 fraga(v2f i) : sv_target{ //直接返回采樣結果,為了維護渲染紋理的透明通道值,不讓其受到混合時使用的透明度值的影響 return tex2d(_maintex, i.uv); } endcg ztest always cull off zwrite off //第一個pass,用于更新渲染紋理的rgb通道 pass { blend srcalpha oneminussrcalpha colormask rgb cgprogram #pragma vertex vert #pragma fragment fragrgb endcg } //第二個pass,用于更新渲染紋理的a通道 pass { blend one zero colormask a cgprogram #pragma vertex vert #pragma fragment fraga endcg } } fallback off} |

以上就是本文的全部內容,希望對大家的學習有所幫助,也希望大家多多支持服務器之家。
原文鏈接:https://blog.csdn.net/weixin_37994402/article/details/79565946


