最近小伙伴跟楊洋我聊到了多環境配置的問題,網上的大部分教程都是copy的,很多文章根本就沒法用,小伙伴很苦惱啊,于是心(yu)地(shu)善(lin)良(feng)的楊洋回去寫了個demo給了小伙 , 那么這邊文章呢,正好給大家講解下關于springboot 的多環境配置
科普時間:
dev、sit、uat、prod是什么呢?
首先給剛接觸的小伙伴們科普下含義
- dev--本地開發環境;
- sit--測試環境;
- uat--準生產環境;
- prod--生產環境;
什么是多環境配置切換呢,為什么要實現呢?
- 這個呢,你快速搭建一個springboot項目,只有一個環境--開發環境(DEV),那你代碼寫好了,推送到SVN或者GIT上,你們項目組的準生產環境(UAT)的mysql的庫跟sit環境肯定不是一個庫,不可能直接修改配置文件吧(當然你真的直接修改當我沒說..)
- 所以,現在小伙伴們就想,我應該如何實現本地開發配置跟準生產配置的自動切換呢?
先準備多環境配置文件
首先呢,你得有一個 application.yml 文件

然后呢,你想實現不同環境切換,那你得有對應環境的配置文件,復制application.yml 四份
,分別對應不同的環境,實現如下

注意:請小伙伴一定要看清楚是-sit 不是_sit ,你這文件不行的,必須是 -xxx結尾 這邊需要說明的是,你 公共部分的配置 ,請放在application.yml中,如果是各個不同的配置(比如不同的mysql配置),分別放在對應的文件中(比如你sit的mysql用戶有增刪查看權限,你uat用戶只有查看權限) 這邊呢,就是把配置部分的基本整理好了,如果這時候小伙伴啟動項目,怎么啟動都是執行的application.yml
那如何切換呢?
這邊需要修改pom.xml來實現切換配置文件,引入如下:
1. 配置profiles節點
|
1
2
3
4
5
6
7
8
9
10
11
12
13
14
15
16
17
18
19
20
21
22
23
24
25
26
27
28
29
30
31
32
|
<!-- 多環境配置方案 --> <profiles> <profile> <!-- 本地開發環境 --> <id>dev</id> <properties> <profileActive>dev</profileActive> </properties> <!-- 默認開啟這個配置 --> <activation> <activeByDefault>true</activeByDefault> </activation> </profile> <profile> <id>sit</id> <properties> <profileActive>sit</profileActive> </properties> </profile> <profile> <id>uat</id> <properties> <profileActive>uat</profileActive> </properties> </profile> <profile> <id>prod</id> <properties> <profileActive>prod</profileActive> </properties> </profile> </profiles> |
2. 開啟過濾,用指定的參數替換directory下的文件中的參數,這是在< build >下的
|
1
2
3
4
5
6
7
|
<resources> <resource> <!--開啟過濾,用指定的參數替換directory下的文件中的參數--> <directory>src/main/resources</directory> <filtering>true</filtering> </resource> </resources> |
3. 添加解析插件
|
1
2
3
4
5
6
7
8
|
<plugin> <groupId>org.apache.maven.plugins</groupId> <artifactId>maven-resources-plugin</artifactId> <configuration> <delimiters>@</delimiters> <useDefaultDelimiters>false</useDefaultDelimiters> </configuration> </plugin> |
4. 修改application.yml文件
注意:@profileActive@ 中的數據對應的是你properties的數據
|
1
2
|
profiles: active: @profileActive@ |
5. 需要添加yaml的依賴,不然無法啟動idea啟動(還有另一種辦法是下載idea支持的插件,這邊不推薦)
|
1
2
3
4
|
<dependency> <groupId>org.yaml</groupId> <artifactId>snakeyaml</artifactId> </dependency> |
驗證多環境配置切換
1.idea啟動驗證
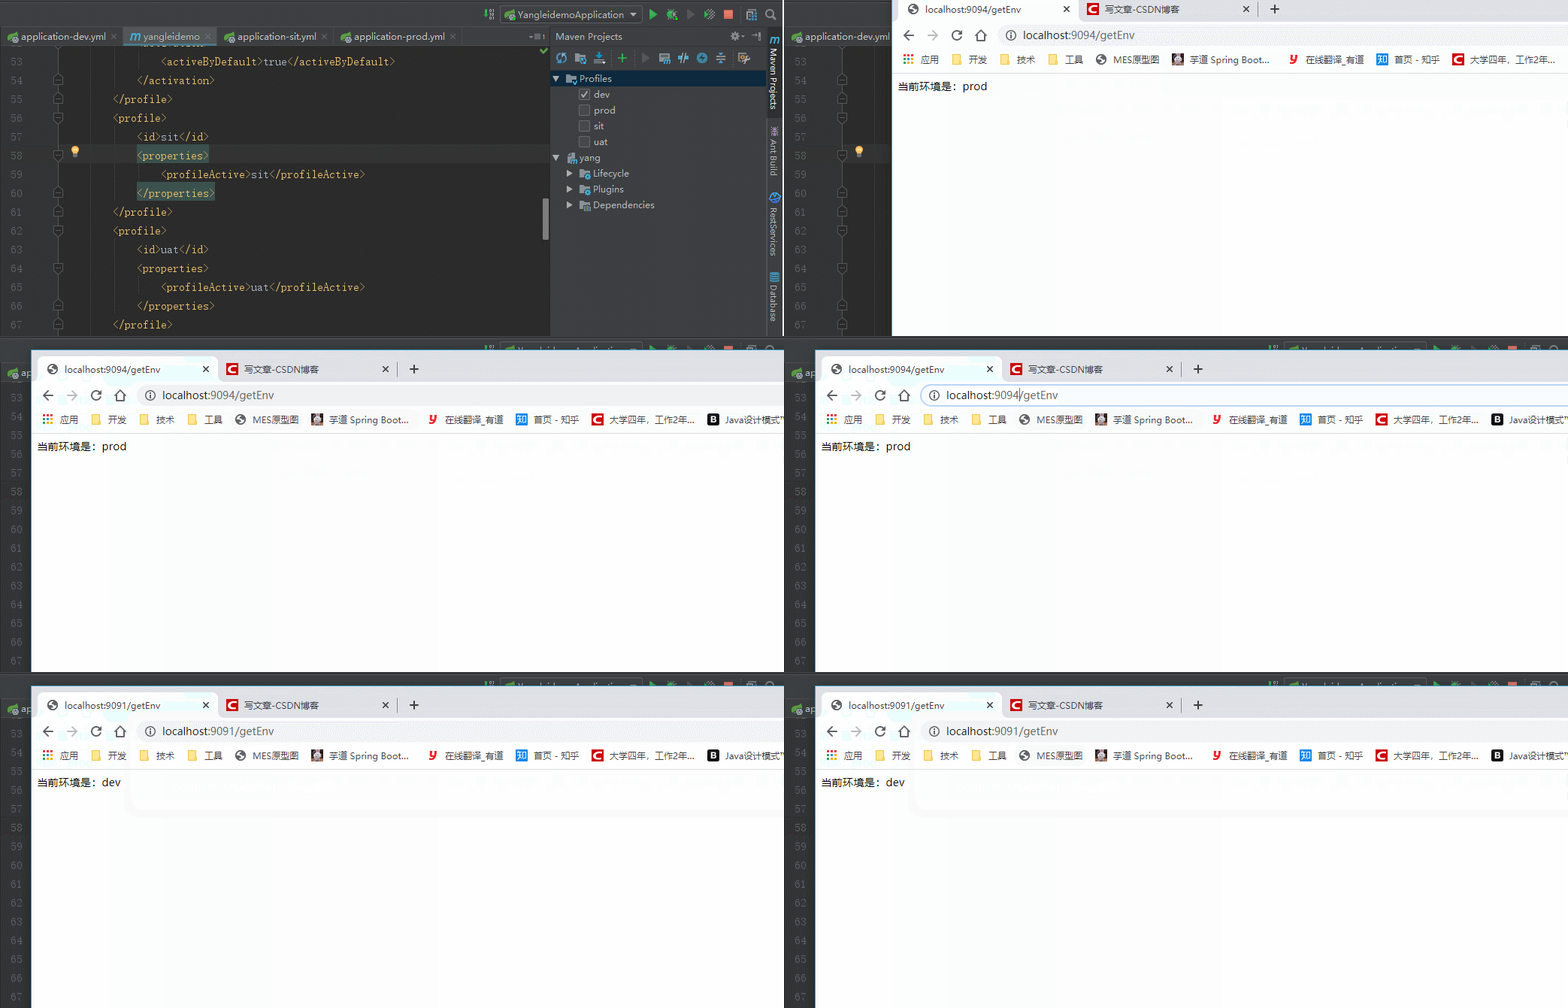
寫了一個demo驗證,每個yml文件添加一個自定義參數,以及對應的端口號都不相同,如下:

一個方法進行驗證
|
1
2
3
4
5
6
7
8
9
10
11
12
13
14
15
16
17
|
/** - @author yanglei - @desc - @date 2020/6/28 */@RestControllerpublic class DemoController { @Value("${envname}") private String envName; @GetMapping @RequestMapping("/getEnv") public String getEnv(){ return "當前環境是:"+envName; }} |
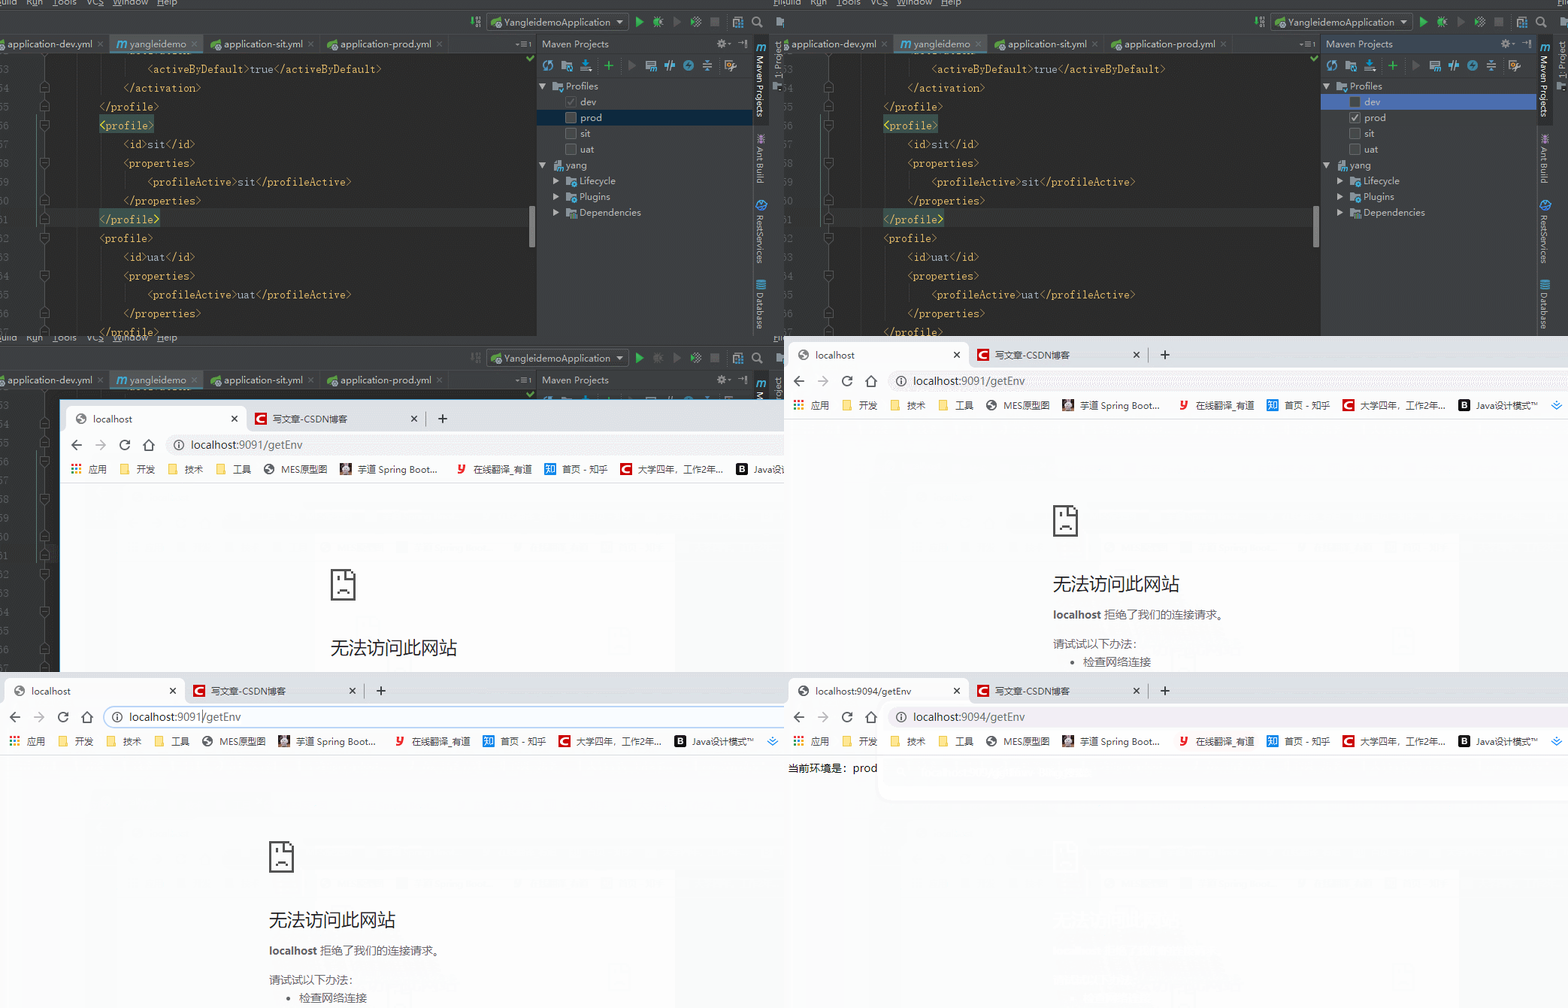
示例圖
dev 測試

prod 測試

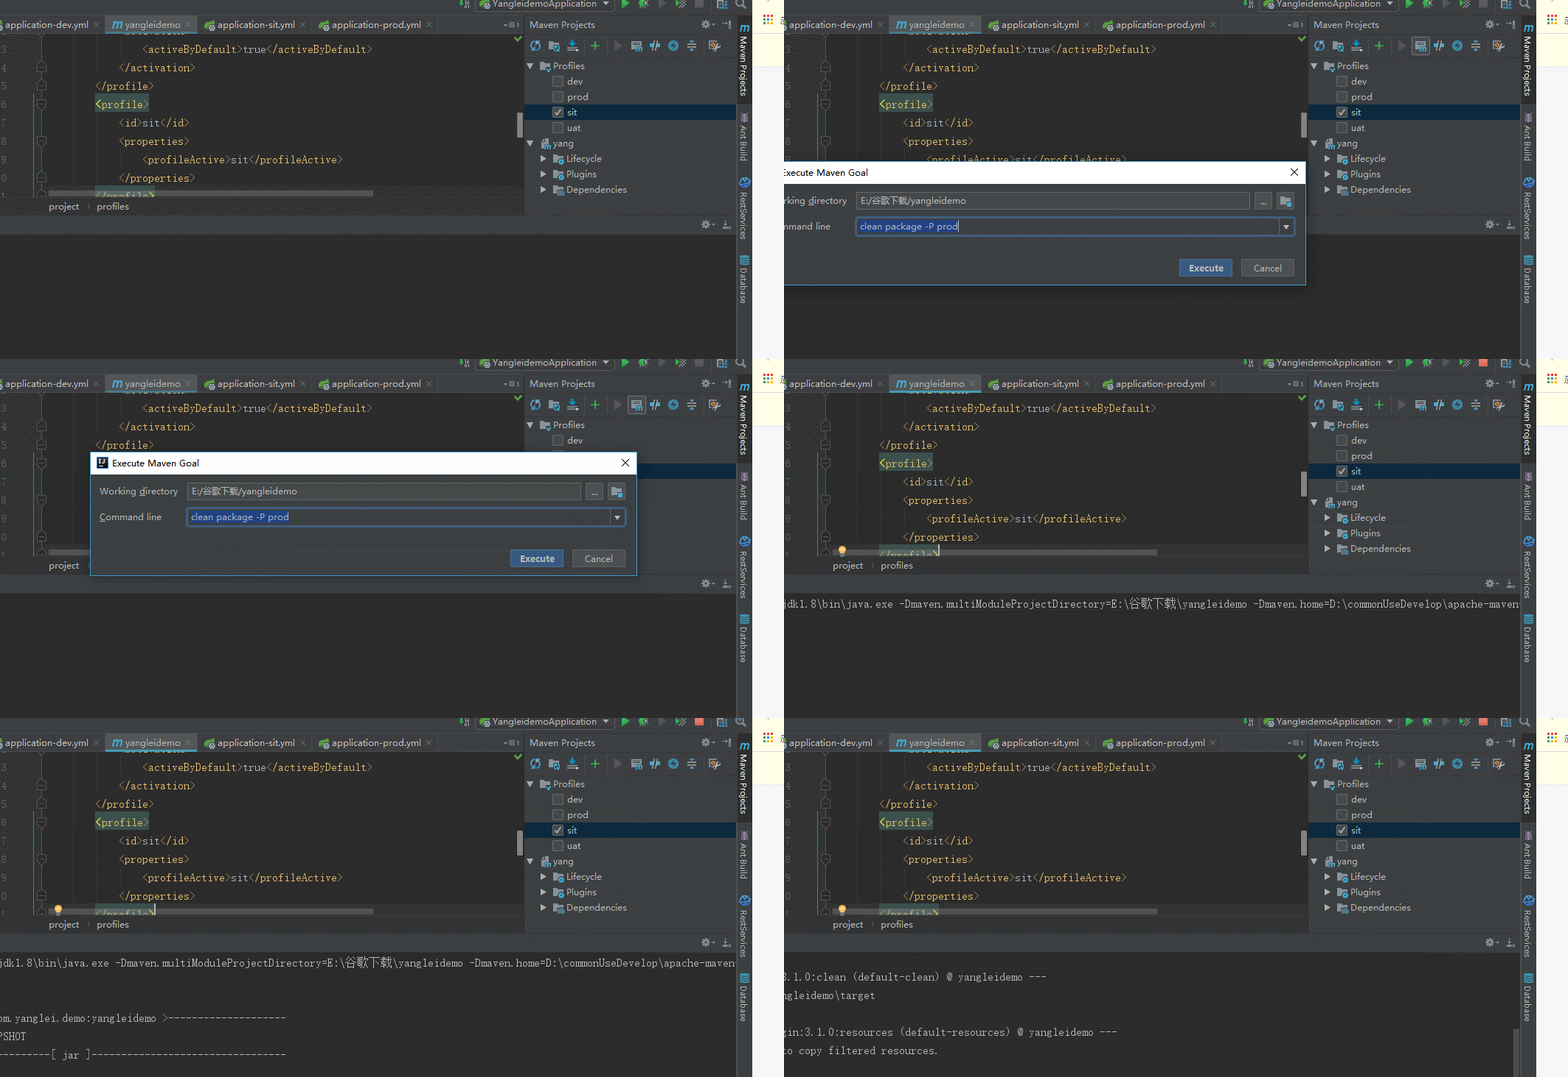
2.打成jar包驗證 使用命令clean package -P prod 進行打包

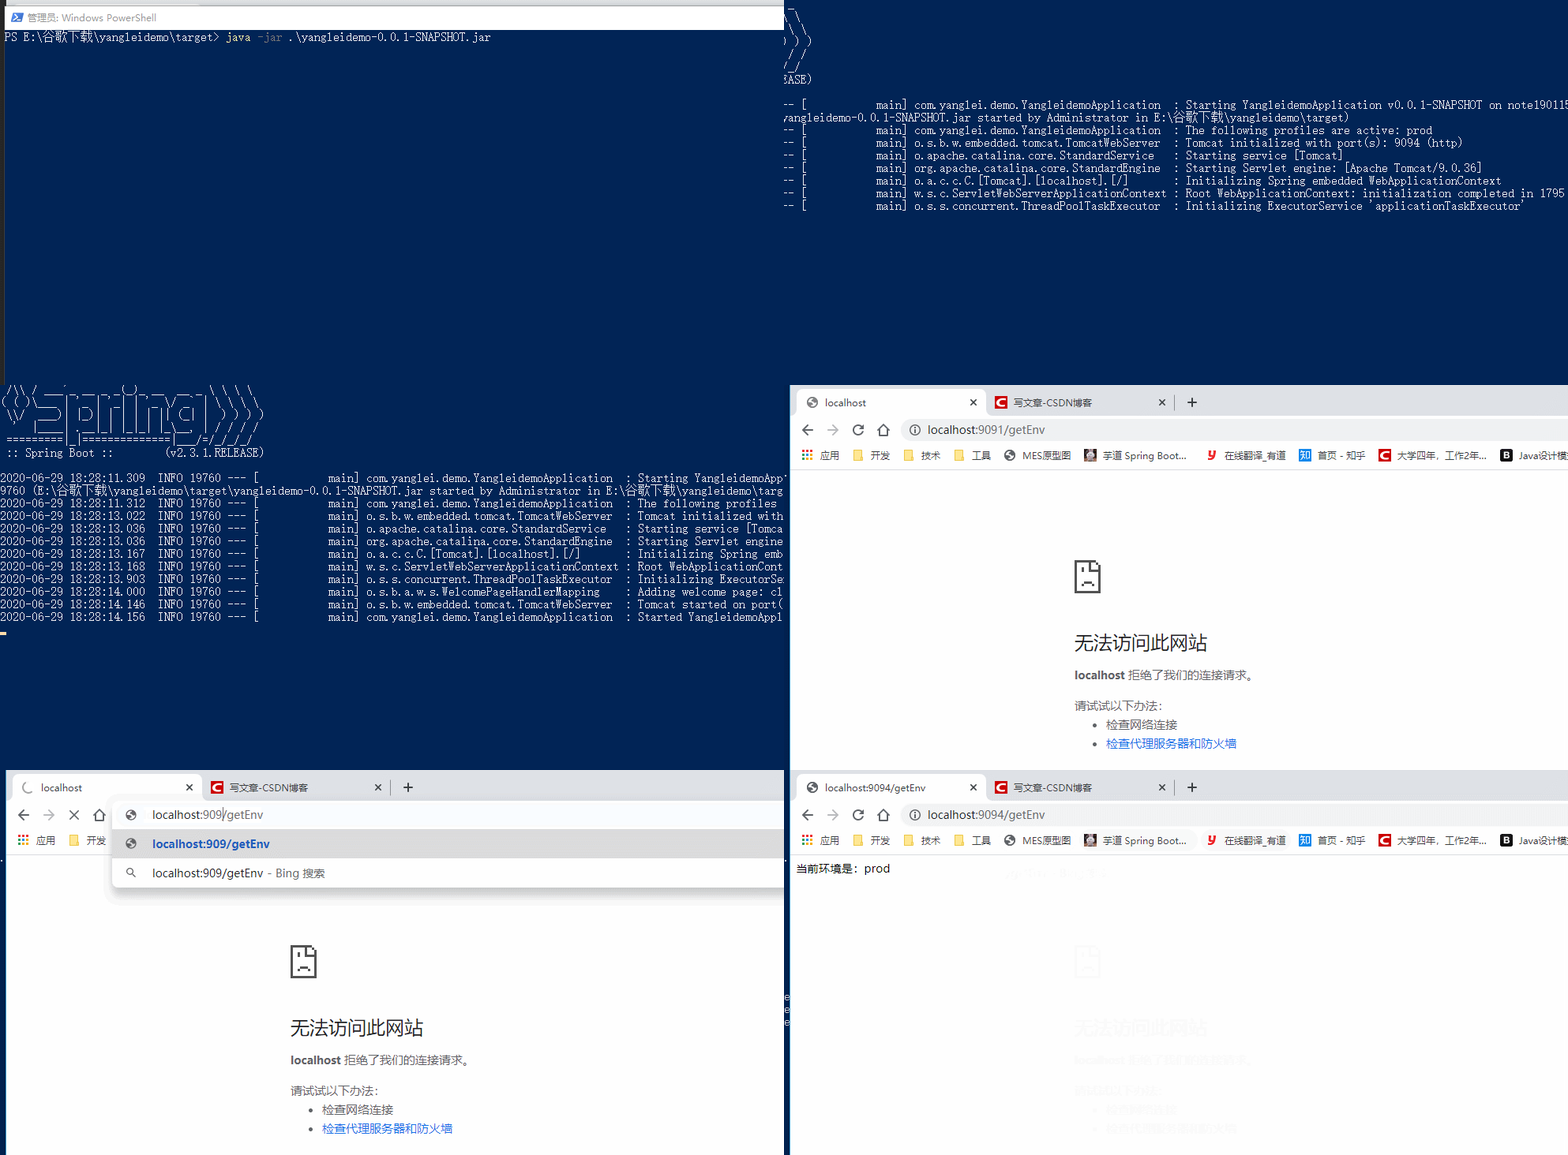
打包完成,進行檢驗

完成!
注意點:
- 如果出現 next token found character '@' that cannot start any token 說明你pom文件的解析插件沒有添加
- 如果出現無法運行idea,說明你yaml的依賴沒有添加
總結
到此這篇關于springboot 多環境配置 yml文件版的實現方法的文章就介紹到這了,更多相關springboot 多環境配置內容請搜索服務器之家以前的文章或繼續瀏覽下面的相關文章希望大家以后多多支持服務器之家!
原文鏈接:https://juejin.im/post/5ef9c49cf265da22e27a6d49


